Wood floors are beautiful, but daily wear can leave behind scratches, stains, or damaged planks. Can you replace part of a wood floor without replacing the entire surface? The answer is often yes. This expert guide explains when partial repairs are possible and how to approach them for a seamless, cost-effective solution that restores your floor.
Instead of jumping into a full replacement, learn how to fix specific damaged areas with the right tools and methods. This guide shows you how to properly identify repairable sections, choose matching wood, and install replacements. Whether it’s a loose plank or a water-damaged spot, we will help you bring your wood floor back to life.
Understanding Wood Floor Damage
Before making repairs, you must understand the kind of wood floor you have and the damage you’re dealing with before choosing the proper fix.
Three Common Types of Wood Flooring
- Solid hardwood: Durable and thick, perfect for sanding and refinishing multiple times.
- Engineered wood: A real wood veneer over a plywood base. It can sometimes be sanded, depending on thickness.
- Laminate: Looks like wood but is made of fiberboard and a photo layer. It can't be sanded or refinished.
Typical Damage
- Water damage: Caused by leaks or humidity, leading to warping or staining.
- Scratches and dents: Furniture movement or pet claws can leave noticeable marks.
- Wear and tear: High-traffic areas often lose their finish or become discolored over time.
To determine if you can replace part of a wood floor, assess how deep or widespread the damage is. Is it just one or two boards? Or is the problem more extensive?
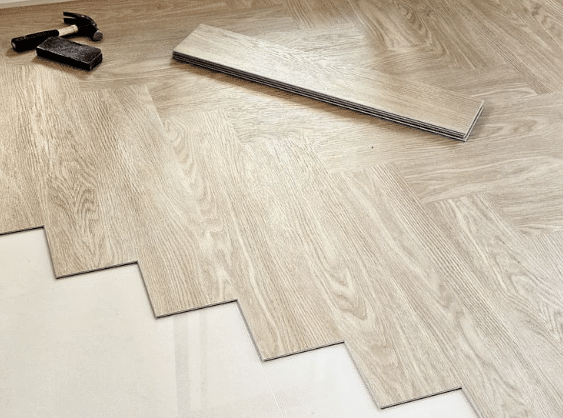
Can You Replace Just a Section of Wood Flooring?
Sometimes, only one spot gets damaged. You can often replace just that section without redoing your entire floor.
1. Yes, You Can Replace Part of a Wood Floor
If you have matching planks or extras from the original batch, partial wood floor replacement is possible and looks great.
2. Check the Age and Condition of Your Floor
Older wood floors may have faded, so new boards could stand out unless you carefully sand and blend the area.
3. Matching the Wood Type and Finish
Replacing damaged boards only works well if you can closely match the wood’s grain, color, and surface finish.
4. Solid Hardwood Is Easier to Repair
Solid hardwood is the easiest to repair since it can be sanded and refinished to blend with the rest of the floor.
5. Engineered Wood Repairs Require Veneer Matching
With engineered floors, matching the veneer thickness is important to avoid visible height differences between old and new boards.
6. Laminate Floors Can Be Tricky but Not Impossible
Laminate floors are harder to repair, but with patience and a close match, you can replace one damaged plank cleanly.
Replacing just one section saves money and keeps the rest of your floor intact. Focus on finding a close match for the best results.
Tools and Materials Needed for Partial Replacement
Having the right tools and gear is important before starting any wood floor repair. This makes replacing damaged boards easier and helps prevent mistakes during partial wood floor replacement.
- Circular Saw – Cuts out the damaged board cleanly without harming nearby planks or the subfloor.
- Chisel and Hammer – Loosens broken boards and helps pry them out carefully.
- Pry Bar – Lifts boards and trim pieces without splitting or cracking the edges.
- Utility Knife – Trims underlayment and cleans up rough edges for a tighter fit.
- Tape Measure – Ensures your new board matches the size of the one you’re replacing.
- Nail Punch – Pushes nails below the surface so they don’t stick out after installation.
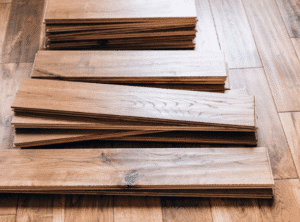
- Matching Wood Planks – Use the same wood type and size for a seamless look.
- Wood Glue or Nails – Secures the new board, depending on whether your floor is glued or nailed down.
- Wood Filler, Stain, and Clear Finish – Fills gaps and blends the color to match your current floor.
- Safety Gear (Gloves, Safety Glasses, Knee Pads, Dust Mask) – Protects you while cutting, lifting, and sanding during the repair.
Always go slow and be gentle to avoid damaging nearby planks. Taking time during removal and installation leads to a cleaner, long-lasting wood floor repair.
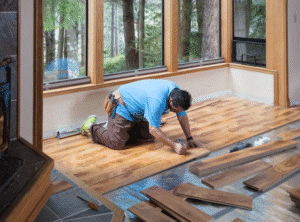
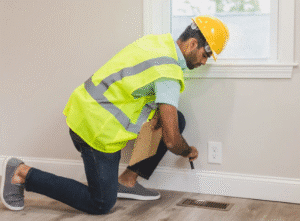
Step-by-Step Guide to Replacing a Damaged Wood Floor Section
Following the proper steps makes a big difference when fixing only a small part of your wood floor. This guide shows you how to get clean, seamless results.
Step 1: Identify and Mark the Damaged Area
Start by spotting the damaged planks, then mark them with painter’s tape or chalk. Be sure to mark an extra half inch past the area you can see is damaged to ensure a cleaner and more complete repair.
Step 2: Carefully Remove the Damaged Planks
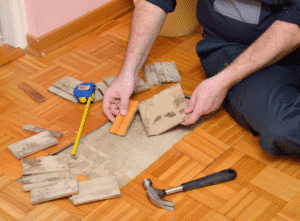
Use a circular saw to cut inside the marked area without damaging nearby boards. Gently lift out the planks using a pry bar or chisel.
Step 3: Prepare the Subfloor for New Installation
Check the subfloor for cracks or debris before installing new boards to ensure a clean, even fit. Clean it well, ensure it’s dry, and make sure the surface is completely level.
Step 4: Fit and Secure the New Wood Planks
Cut replacement boards to size, matching tongue-and-groove joints if possible. Secure with nails or glue, depending on how the original flooring was installed.
Step 5: Sand, Stain, and Finish to Match Existing Flooring
Lightly sand the new boards and the surrounding area. Apply a matching stain and clear finish so the new section blends with the rest of the floor.
These simple steps can help you achieve a professional result without replacing the entire floor. Still wondering if you can replace part of a wood floor? Now you know, it’s definitely doable.
Tips for Matching New Wood with Existing Flooring
Getting the new section to blend in takes patience and careful product selection. These tips help reduce noticeable differences.
Wood Species and Grain
Pick the same wood species and match the grain direction to help the replacement board blend with your current hardwood floor surface.
Staining Techniques
Test the stain on a leftover piece of wood before applying it to your floor. Adjust coat layers or blend stains to better match the color depth and tone across boards.
Age and Light Exposure
Sunlight and time naturally fade wood. To blend more evenly, use a lighter stain or let the new board sit exposed for weeks.
The better your match, the less noticeable the repair will be. If you’re unsure, consult a flooring expert to help with stain blending.
When to Consider Full Floor Replacement
Sometimes, a simple wood floor repair just won’t cut it. If you have multiple damaged spots, deep water stains, or subfloor problems, a full replacement might be your best option. Replacing everything ensures your floor looks even and performs well for years.
Partial wood floor replacement saves money upfront, but full replacement offers long-term value and a fresh, consistent look. If you plan to sell your home or want a smoother finish throughout, investing in new flooring could boost your home’s appeal and overall market value.
Maintenance Tips to Prevent Future Damage
Once your wood floor repair is done, a few simple habits will help it stay in great shape. These tips can help prevent another partial wood floor replacement.
1. Regular Cleaning
Sweep daily and mop once a week with cleaners made for wood floors. Keeping dirt and dust off your floor helps avoid scratches, buildup, and long-term surface wear.
2. Furniture Protection
Add felt pads to chairs, tables, and furniture legs. These pads protect the floor from scratches and scuffs when furniture shifts or slides.
3. Rug Placement
Use area rugs in high-traffic spots like hallways, entryways, or under furniture. Rugs add a soft layer that helps reduce daily wear and tear.
4. Humidity Control
Maintain indoor humidity between 35% and 55% year-round. This keeps your wood floor from shrinking, swelling, or warping with seasonal moisture changes.
5. Check-Ups
Look over your floors for cracks, gaps, or fading every few months. Catching minor issues early can help avoid more costly floor repairs later.
With these easy wood floor maintenance habits, your floors will last longer and look better. It’s a smart way to avoid future damage and repairs.
Frequently Asked Questions
Can I replace a single plank in the middle of the floor?
Yes, but it takes careful measuring and cutting. You’ll need to remove the damaged plank without harming the others and install a new one that fits perfectly.
Can engineered hardwood be partially replaced?
Yes, but the wear layer must be thick enough for sanding or replacement. It’s also important to closely match the finish for a clean, blended look.
Can you replace part of a prefinished hardwood floor?
Yes, but blending old and new planks can be tricky because factory finishes often have a smooth, glossy look that’s hard to match. A spot repair may still work with good color-matching and sanding.
How do you remove a damaged tongue-and-groove floorboard?
Use a circular saw to cut down the middle of the board, then carefully lift it out with a chisel or pry bar. For easier installation, you may need to trim the groove edge of the replacement board.
Conclusion
Can you replace part of a wood floor? In many cases, yes. This smart option can save money and help keep your original flooring in good shape. The success depends on your wood type, the level of damage, and how well you can match the replacement boards.
When the damage is widespread, or the boards are no longer available, a full replacement might be the better option. Spot repairs work well for smaller problems, but larger issues need a bigger fix. At Ft. Worth Refinishing, we help you choose the best for your home.
If you're unsure about the next step, our expert team can guide you through it. We offer professional advice and top-rated refinishing services in Fort Worth, TX. Let us help you restore your floors and make them look like new again with honest, skilled care.
End Note
At Ft. Worth Refinishing, we handle everything from spot repairs to complete surface transformations. Explore our full range of refinishing services, including shower, bathtub, and bathroom vanity refinishing, to bring lasting beauty and function back into your home.
We proudly serve Fort Worth and nearby areas. Check out the areas we serve, view our before-and-after gallery, and learn more about our story on the About Us page, philosophy, and customer reviews. You will see why homeowners trust our team for quality, care, and honest results every time.
Need help deciding what's next for your home? Browse our blog for more helpful advice and tips, follow us on Facebook for more updates, or contact us directly to schedule a visit. At Fort Worth Refinishing, we’re ready to make your surfaces look and feel like new again.
Fort Worth Refinishing
2627 S Cooper St Suite E12, Arlington, TX 76015, United States
+18176339100