How to Resurface Kitchen Countertops: DIY Guide for a Fresh Look

Resurface kitchen countertops to transform your space without the high costs or hassle of a full remodel. This popular DIY project is an ideal choice for refreshing your kitchen’s look on a budget. Unlike a complete countertop replacement, resurfacing offers both affordability and the flexibility to personalize, letting you craft a style that’s uniquely yours.


Imagine a kitchen update with your favorite colors and finishes, all without major expenses or mess. Resurfacing provides a functional, stylish upgrade that breathes new life into your space. 


Ready to learn how? Let’s dive into this guide to resurface kitchen countertops and achieve a fresh, modern look without the disruption of a full renovation.

Elegant Kitchen


Why Resurface Kitchen Countertops?

Kitchen countertops are the heart of any cooking space, combining style and practicality. Over time, they can get scratched, stained, or look outdated. Instead of paying for a pricey and time-consuming replacement, resurfacing offers an easy, budget-friendly way to bring them back to life.


Cost Savings Compared to Replacement

One of the most compelling reasons to resurface kitchen countertops is cost efficiency. Replacing countertops means paying for new materials, labor, and possible adjustments, which can add up fast. With resurfacing, you can get a fresh, updated look for much less by working with what’s already there. This approach saves money while still giving your kitchen a beautiful transformation.


Environmental Benefits of Reusing Materials

Choosing to resurface kitchen countertops is a smart, eco-friendly option. Instead of throwing out your old countertops, resurfacing lets you refresh them, cutting down on waste. This sustainable choice helps save resources and reduces the environmental impact of home upgrades.


Ability to Customize with New Finishes and Colors

When you resurface kitchen countertops, you’re giving your space a stylish update without breaking the bank. It lets you pick from a wide range of finishes and colors, so you can go for a modern, simple look or add bold patterns and colors. Plus, you can easily keep up with trends without making a big, long-term commitment.


Types of Countertop Resurfacing Options

Resurfacing comes in different styles to match various looks and needs. Here are some popular countertop resurfacing options, each with its own pros and cons.

Paint and Sealant

Applying paint and sealant is an ideal choice for reviving laminate or wood surfaces. It’s budget-friendly and easy enough for a DIY project. This method involves sanding the surface, adding paint, and finishing with a sealant to make it strong and long-lasting.


Pros:


Cons:


Concrete Overlay

A concrete overlay can give a sleek, modern look. It involves spreading a thin concrete layer over your existing surface for an industrial, contemporary feel – great for minimalist kitchens.


Pros:


Cons:


Epoxy Resin

Epoxy resin creates a glossy, durable finish that can look like stone or marble. It’s a great choice if you want a high-end look without the cost of real stone.


Pros:


Cons:


Tile Overlay

Applying a tile overlay adds texture and color. You can put tiles directly over your current countertop for a fresh look with unique patterns or simple, clean designs.


Pros:


Cons:


Resurfacing kitchen countertops is a great way to save money, reduce waste, and refresh your kitchen’s style. Each method offers unique benefits, so you can choose the one that fits your style and needs, whether it’s a sleek concrete look, a glossy epoxy finish, or a timeless tile design.


Materials and Tools Needed

Getting the right materials is essential for a smooth resurface kitchen countertops. With the right supplies and tools, you can make the job easier and achieve a great result.


List of Essential Materials

Before starting the project, make sure you have the following essential materials:


Basic Tools

Having the correct tools on hand will make the resurfacing process more manageable and efficient. Include the following in your toolkit:


Kitchen Countertops


Step-by-Step Guide to Resurfacing Kitchen Countertops

Ready to give your kitchen countertops a fresh look? Follow these simple steps for the best results.


Step 1: Clean and Prep the Surface

Start by cleaning your countertop well. Use warm water and a mild detergent to remove grease, grime, and any dirt that might prevent the new surface from sticking. Make sure the surface is completely dry before moving to the next step. For extra sticky spots, a degreaser can help get the countertop extra clean.


Step 2: Sand and Smooth the Surface

After cleaning, begin sanding the countertop. Use coarse-grit sandpaper first to remove the glossy top layer, helping the new materials stick better. Then, switch to finer-grit sandpaper to make the surface smooth. Once finished, wipe down the countertop with a damp cloth to remove any dust.


Step 3: Apply Primer (if needed)

Check if a primer is recommended for your resurfacing product. Primer helps the new layer bond to the old surface. Apply it evenly over the countertop with a brush or roller, aiming for a smooth, streak-free finish. Let the primer dry fully according to the label’s instructions.


Step 4: Add the Chosen Resurfacing Material

Now, it’s time to put on your chosen resurfacing material. If you’re using countertop paint or epoxy resin, follow the manufacturer’s instructions closely. Use a roller for smooth coverage on large areas and a brush for edges or tight spaces. Apply thin, even coats and give each coat plenty of time to dry to avoid streaks or bubbles. You may need to add several coats for full coverage.


Step 5: Seal and Finish

To protect your new countertop, apply a sealant once everything is completely dry. This adds durability and makes it more water-resistant. Follow the sealant’s instructions, spreading it evenly over the surface. Let it dry fully before you start using the countertop again.

After these steps, your kitchen countertops will have a fresh, updated look that boosts both style and function. Though it takes some time, this DIY project is a rewarding, budget-friendly way to transform your kitchen. Enjoy the results of your hard work!


Tips to Avoid Common DIY Mistakes

Achieving a professional finish can make your resurface kitchen countertop project look like new. For those taking on a resurfacing project, a polished and enduring finish is essential to ensure the countertop not only looks appealing but also remains functional. To get a professional look, start by avoiding some common DIY mistakes.


Maintenance Tips for Resurfaced Countertops

Keeping your resurfaced kitchen countertops in good shape is easy with a few simple care steps. Here’s how to easily include it in your daily routine:


Following these simple steps will help keep your countertops looking shiny and new for years to come.


Do's and Don’ts for Preserving the Look Over Time

Preserving the appearance of your resurfaced countertops requires mindful usage and care practices. Here are some key do's and don'ts to keep in mind:

Do's:


Don’ts:


By following these simple do’s and don’ts, you can make your resurfaced kitchen countertops last longer and keep them looking great. Putting care into your DIY project and paying attention to details can truly transform your kitchen. Regular maintenance will help keep your refreshed countertops looking beautiful and functional for years. With a little planning and ongoing care, your countertops will stay a shining example of your hard work and creativity.


Frequently Asked Questions


How long does countertop resurfacing last?

Countertop resurfacing is a cost-effective way to refresh your kitchen without the expense of a full replacement. On average, a well-applied countertop resurfacing can last between 5 to 7 years, depending on usage and maintenance. High-quality application and proper care can extend the lifespan even further. Regular cleaning and avoiding harsh abrasives will help maintain the look and integrity of the resurfaced surface, ensuring it remains appealing for years.


Do countertop refinishing kits work?

Countertop refinishing kits available in the market can be quite effective when used correctly. These kits are designed for those who wish to undertake a DIY project and want a quick, budget-friendly kitchen update. The effectiveness largely depends on the preparation and application process. Following the instructions carefully is crucial to achieving a high-quality finish. Users have successfully used them to cover stains, marks, and minor damages, providing their countertops with a renewed look.


What is the best way to make a countertop look new again?

To make a countertop look brand new, preparation is key. Start by thoroughly cleaning the surface to remove any grease and dirt. Sand the countertop lightly to ensure the new surface material adheres properly. Apply a primer, followed by the resurfacing coat, and finish with a sealant to protect the new surface. For those not inclined towards DIY, a professional service can offer pristine results with the added benefit of expertise in material choice and application techniques.


Is refinishing countertops better than replacing them?

Refinishing countertops is often a better option than replacing them, especially when working within a budget. The cost is significantly lower, and the process is less disruptive to daily life. Refinishing also offers the opportunity to modernize the look of your countertops without the environmental impact of disposing of old materials. However, if the structural integrity of your countertops is compromised, replacement might be necessary.


How to refresh my kitchen without changing countertops?

You can refresh your kitchen without changing the countertops by painting the cabinets for a fresh look, upgrading the hardware for a modern feel, adding a stylish backsplash to create a focal point, and changing lighting fixtures to improve ambiance. These small updates can make a big impact, giving your kitchen a new life without a high cost.


Conclusion


Resurfacing kitchen countertops is a fantastic way to give your kitchen a fresh, updated look without the cost and hassle of a full remodel. It’s an ideal option for homeowners wanting a quick transformation that’s both budget-friendly and visually impactful. By choosing to resurface kitchen countertops, you’re not only enhancing your space’s style but also extending the life of your countertops with a durable, new finish.


This DIY project can also be a highly rewarding experience, giving you the chance to put your personal touch on the heart of your home. However, if you’d prefer to have a professional handle the work or need expert guidance, Fort Worth Refinishing is the best countertop refinishing company in Arlington, TX. Our experienced team ensures a flawless finish, providing the peace of mind that comes with quality craftsmanship.


With this guide and the right resources, you’re ready to take the next step in upgrading your kitchen. Whether you tackle it yourself or seek professional help, resurfacing your countertops is a practical and stylish way to refresh your kitchen space. Enjoy the satisfaction of transforming your kitchen into a beautiful and functional area you’ll love for years to come.


End Note


At Ft. Worth Refinishing, we’re passionate about transforming your spaces with our expert bathtub, shower, and countertop refinishing services. Discover the quality and craftsmanship we offer by visiting Our Services and Gallery pages, where you can see stunning before-and-after transformations that showcase our dedication to excellence.


We are proud to serve in Forth Worth, TX areas, so check out our Areas We Service to see if we’re in your neighborhood. Our mission is to provide high-quality refinishing solutions tailored to your needs. Learn more about who we are and what drives us on our About Us page.


Stay in the loop with our latest tips, trends, and project highlights by following our Blog and connecting with us on Facebook. We’d love to help you refresh your space, so don’t hesitate to reach out through our Contact Us page. At Ft. Worth Refinishing, your satisfaction is our top priority, and we’re excited to help you create the beautiful spaces you deserve!


Fiberglass Shower Refinishing: Save Thousands with This Simple Upgrade!

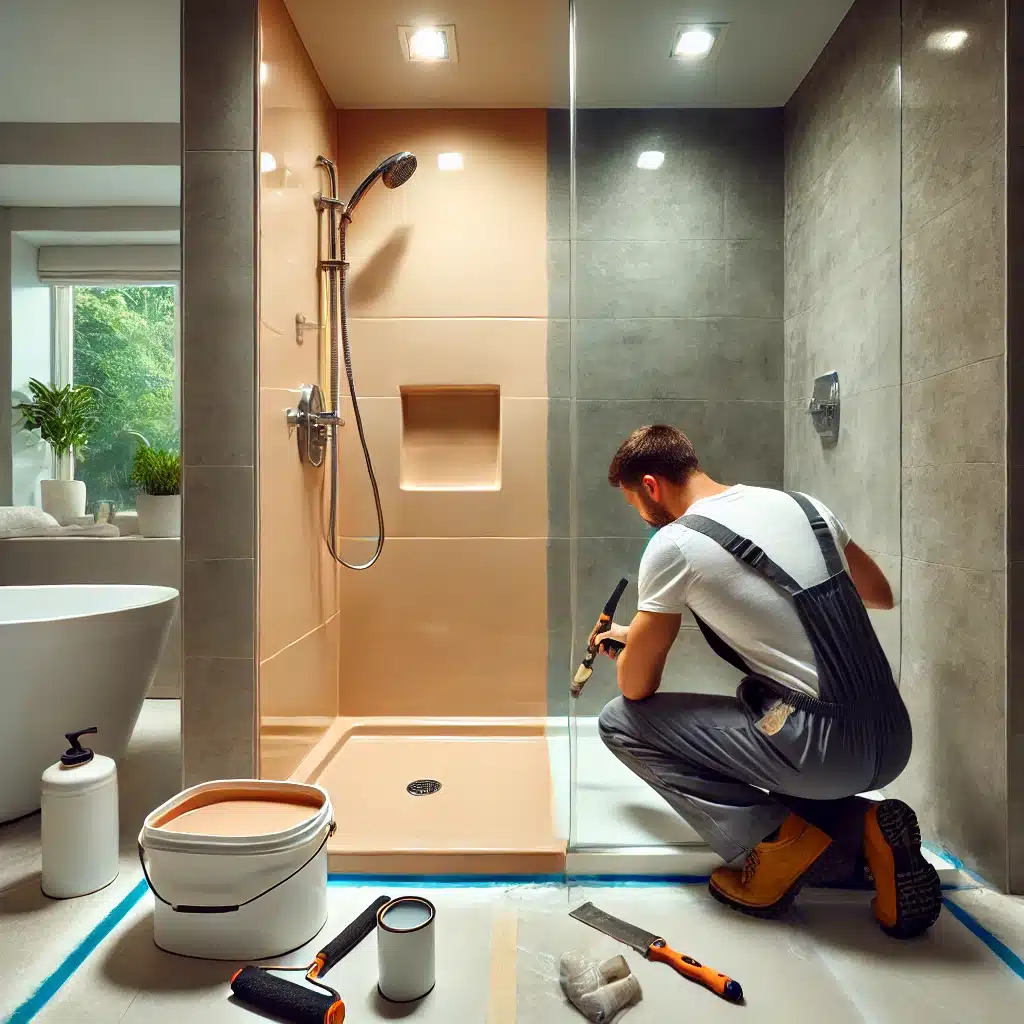
If your shower looks worn and outdated, fiberglass shower refinishing is the affordable solution you’ve been waiting for. Many homeowners think they need a full shower replacement when wear and tear start to show, but refinishing offers a cost-effective way to refresh your bathroom without a hefty remodel bill.

This easy process removes stains, repairs minor damage, and leaves your shower looking brand new at a fraction of the cost of a replacement. You will not only save thousands money but also avoid the mess and stress of a complete renovation, all while enjoying a fresh, modern look.

Ready to make your bathroom look amazing without spending a ton of money? Let’s dive into this blog and try fiberglass shower refinishing to enjoy a stunning, beautiful look in no time. Fiberglass shower refinishing is quick, efficient, and the perfect way to bring new life to your space!

Fiberglass Shower Refinishing


Signs That Your Fiberglass Shower Needs Refinishing

Before we explore the benefits and process of fiberglass shower refinishing, it's essential to recognize the telltale signs that your shower is in dire need of an upgrade. Here are a few clues that you should pay attention to:

Cracks and Chips

Over time, fiberglass showers can develop unsightly cracks and chips, compromising their appearance and potentially leading to leaks or water damage.

Stains and Discoloration

Stubborn stains, mildew buildup, and discoloration can make even the most pristine shower look dingy and unappealing.

Outdated Style

If your shower's design or color scheme is outdated or clashes with your current bathroom decor, refinishing can provide a fresh, modern look without the hassle of a full replacement.

Fading and Dullness

Years of exposure to water, cleaning products, and UV rays can cause the fiberglass surface to fade and lose its shine, making it appear dull and lifeless.

If you've noticed any of these signs, it's time to consider fiberglass shower refinishing as a cost-effective and convenient solution.

The Benefits of Fiberglass Shower Refinishing

Fiberglass shower refinishing offers a myriad of benefits that make it an attractive option for homeowners:

Cost Savings

Compared to a full shower replacement, refinishing can save you a significant amount of money, often costing only a fraction of the price.

Quick and Convenient

The refinishing process is relatively quick, typically taking just a day or two, minimizing disruption to your daily routine.

Eco-Friendly

By refinishing your existing shower, you are reducing waste and conserving natural resources, making it an environmentally friendly choice.

Customizable

Refinishing allows you to choose from a wide range of colors and finishes, enabling you to create a personalized look that complements your bathroom's style.

Increased Home Value

A beautifully refinished shower can enhance the overall appeal and value of your home, making it a worthwhile investment for potential future resale.

With these benefits in mind, it's easy to see why fiberglass shower refinishing has become a popular choice among homeowners seeking a cost-effective and convenient bathroom upgrade.

The Process of Fiberglass Shower Refinishing

Now that you understand the benefits, let's dive into the process of fiberglass shower refinishing. While the specifics may vary slightly depending on the contractor or DIY method, the general steps are as follows:

1. Surface Preparation

The first step is to thoroughly clean and prepare the fiberglass surface. This involves removing any existing caulk, soap scum, and grime, as well as sanding the surface to create a suitable bonding surface for the new finish.

2. Repair and Patching

Any cracks, chips, or damaged areas are repaired using a specialized filler or putty, ensuring a smooth and even surface for the refinishing process.

3. Etching or Priming

Depending on the refinishing method, the surface may be etched or primed to promote better adhesion of the new finish.

4. Application of Refinishing Coating

The refinishing coating, typically a durable acrylic or polyurethane-based material, is carefully applied using specialized spraying equipment or rollers. You will probably need more than one coat to make sure it looks good and holds up.

5. Curing and Drying

After the coating has been applied, the shower is allowed to cure and dry completely, following the manufacturer's recommendations for optimal results.

6. Final Touches

Once the refinishing coating has fully cured, any necessary caulking or additional touchups are performed to ensure a seamless and professional finish.

Throughout the process, proper ventilation and safety precautions are essential to ensure a successful and safe refinishing experience.

DIY VS. Professional Fiberglass Shower Refinishing

When it comes to fiberglass shower refinishing, you might be wondering whether to tackle it yourself or leave it to the professionals. Let’s explore the key differences between DIY and professional refinishing to help you make the best choice for your bathroom.

DIY Fiberglass Shower Refinishing

For those with a DIY mindset and a willingness to tackle the project themselves, DIY fiberglass shower refinishing is a viable option. However, it's crucial to understand that this process requires careful preparation, attention to detail, and adherence to safety protocols.

  1. Gather Necessary Supplies: Before starting, ensure you have all the required supplies, such as refinishing kits, sandpaper, protective gear (gloves, masks, and goggles), and any necessary tools.
  2. Prepare the Work Area: Proper ventilation is crucial during the refinishing process. Open windows, use fans, and consider setting up a temporary enclosure to contain any fumes or overspray.
  3. Follow Instructions Carefully: Carefully read and follow the instructions provided by the refinishing kit manufacturer. Skipping steps or rushing through the process can lead to subpar results or even safety hazards.
  4. Practice Patience and Attention to Detail: Refinishing requires a steady hand and patience. Take your time, especially during the application and drying stages, to ensure a smooth and even finish.
  5. Consider Professional Assistance: If you're unsure about your DIY skills or the complexity of the project, it may be wise to consult or hire a professional refinishing contractor to ensure a flawless outcome.

While DIY fiberglass shower refinishing can be a rewarding and cost-saving endeavor, it's essential to approach the project with caution and a willingness to follow proper safety protocols.

Professional Fiberglass Shower Refinishing

While DIY fiberglass shower refinishing is a viable option for some homeowners, there are distinct advantages to hiring a professional refinishing contractor. Here are some reasons you should think about hiring someone who knows what they’re doing:

While professional refinishing services may come at a higher initial cost compared to DIY, the expertise, quality of work, and peace of mind they provide can make it a worthwhile investment for many homeowners.

Tips for Maintaining a Refinished Fiberglass Shower

Once your fiberglass shower has been beautifully refinished, it's crucial to take the necessary steps to ensure its longevity and maintain its pristine appearance. Here are some helpful tips:

Proper Cleaning

Use only mild, non-abrasive cleaners specifically designed for refinished surfaces. Avoid harsh chemicals or abrasive scrubbing pads that can damage the new finish.

Ventilation

Ensure proper ventilation during and after showering to prevent moisture buildup, which can lead to mildew and mold growth.

Caulking Maintenance

Regularly inspect and replace any deteriorating caulk around the shower enclosure to prevent water seepage and potential damage.

Avoid Heavy Impact

Be mindful of dropping heavy objects or applying excessive force on the refinished surface, as this can cause chips or cracks.

Regular Resealing

Depending on the type of refinishing coating used, you may need to reseal the surface periodically to maintain its protective barrier and glossy appearance.

By following these simple tips, you can ensure that your refinished fiberglass shower remains a stunning and functional part of your bathroom for years to come.

Cost Comparison: Fiberglass Shower Refinishing vs Replacement

If you're debating whether to refinish or replace your fiberglass shower, the numbers alone might sway you. Fiberglass shower refinishing typically costs between $300 to $1,000, while a basic shower replacement can easily run you $1,500 to $3,500. And if you're eyeing a more high-end shower replacement, you could be looking at $4,000 to $8,000 or even more.

Think about that for a moment. Even at the higher end of refinishing costs, you're still saving a significant amount of money. Refinishing brings your shower back to life by fixing wear and tear, restoring its look, and doing it all at a fraction of the price. Plus, there’s less hassle, and there is no need to tear out your old shower and deal with days of construction.

Speaking of time, refinishing is also faster. Replacing a shower can take days, sometimes weeks. Meanwhile, refinishing can be done in one or two days, meaning less disruption and lower labor costs. You get a fresh, updated shower without the headache of a full remodel.

Common Mistakes to Avoid During Fiberglass Shower Refinishing

Whether you're tackling a DIY fiberglass shower refinishing project or hiring a professional, it's essential to be aware of common mistakes that can compromise the quality and longevity of the finished product. Here are some pitfalls to avoid:

Inadequate Surface Preparation

Failing to properly clean, sand, and prepare the fiberglass surface can lead to poor adhesion and premature failure of the refinishing coating.

Ignoring Manufacturer Instructions

Each refinishing product has specific application instructions and requirements. Deviating from these guidelines can result in subpar results or even safety hazards.

Improper Ventilation

Inadequate ventilation during the refinishing process can lead to excessive fume exposure and potential health risks, as well as compromising the curing process of the coating.

Rushing the Process

Refinishing requires patience and attention to detail. Attempting to rush through the steps or skipping crucial drying and curing times can result in a poor finish or premature failure.

Neglecting Maintenance

Failing to properly maintain and care for the refinished surface can lead to premature wear, staining, or damage, negating the benefits of the refinishing process.

By being aware of these common mistakes and taking the necessary precautions, you can ensure a successful and long-lasting fiberglass shower refinishing project.

Frequently Asked Questions

Can fiberglass showers be resurfaced? 

Yes, fiberglass showers can be resurfaced! This process, often called refinishing or reglazing, restores the look of your shower by repairing any damage, removing stains, and applying a fresh, durable coating that makes it look new again. It’s a great alternative to a full replacement and can save you a lot of money.

How do you restore a fiberglass shower? 

Restoring a fiberglass shower involves cleaning the surface, repairing any chips or cracks, and then applying a special coating to give it a smooth, like-new finish. The refinishing process not only fixes damage but also brightens up the entire look of your shower in just a day or two.

How do you make fiberglass look new again? 

To make fiberglass look new again, you will need to refinish it. This involves deep cleaning, repairing any worn areas, and applying a fresh top coat to restore its shine and durability. Professional refinishing can bring your shower back to its original condition without the need for a costly replacement.

How much does it cost to reglaze a fiberglass shower? 

The cost to reglaze a fiberglass shower usually ranges between $300 and $1,000, depending on the size of the shower and the condition of the surface. While prices vary, this is still much cheaper than a full shower replacement, which can cost thousands of dollars.

How long do fiberglass showers last? 

A properly maintained fiberglass shower can last for many years, typically 10-15 years or longer. If you have your shower refinished, you can extend its life even further, giving it a fresh look and durable finish that lasts for several more years.

Conclusion

Fiberglass shower refinishing is a game-changer for homeowners seeking a cost-effective and convenient way to breathe new life into their outdated bathrooms. At Ft. Worth Refinishing, we believe you shouldn’t have to spend a fortune to enjoy a beautiful, refreshed bathroom. Fiberglass shower refinishing is the smart and cost-effective way to give your space the upgrade it needs without the headache of a full remodel. Why replace when you can refinish?

Our team specializes in making outdated showers look brand new again, removing stains, repairing damage, and giving your shower a sleek, modern finish. Not only will you save thousands, but the process is quick and hassle-free, often completed in just one day.

Ready to see the difference for yourself? Let Ft. Worth Refinishing transform your shower and breathe new life into your bathroom, without the mess, stress, or high costs. Contact us today and take the first step toward your stunning, budget-friendly makeover.

End Note

At Ft. Worth Refinishing, we are passionate about helping you transform your bathroom and kitchen surfaces with expert refinishing services that save you time and money. Whether you are looking to refresh your bathtub, shower, or countertops, we’ve got you covered! Visit our Services page to explore everything we offer, and don’t forget to check out our Gallery to see the stunning results we have achieved for our satisfied customers.

Curious if we serve your area? Head over to our Areas We Serve page to find out if we are in your neighborhood. Learn more about our team’s story, values, and dedication to quality by visiting the About Us section. Follow our Blog post to stay updated with the latest refinishing trends, tips, and insights that we love sharing.

Stay connected with us on Facebook for real-time updates, customer stories, and engaging content. Ready to give your room a cool new makeover? Get in touch with us via our Contact Us page and let’s get started on creating your dream space!

How to Clean Jacuzzi Jets in Bathtub: 2024 Easy Guide

Have you ever noticed that your Jacuzzi jets are not as fresh as they used to be? Learning how to clean Jacuzzi jets in a bathtub is key to bringing back that clean, spa-like experience. Over time, soap scum, grime, and bacteria can collect inside the jets, leaving your tub less inviting and even a little unpleasant.


Ignoring the buildup inside your Jacuzzi jets can lead to more than just an eyesore. Dirty jets can cause foul odors, affect water flow, and even pose health risks. But don’t worry, with a regular cleaning routine, you can easily prevent these issues and keep your tub looking and feeling great.


Imagine stepping into your bathtub, knowing that every jet is working smoothly and hygienically. This comprehensive 2024 guide will show you how to clean Jacuzzi jets in a bathtub with simple tools and steps so you can enjoy a truly relaxing soak every time.

Jacuzzi Jets in Bathtub


Why is it Important to Clean Jacuzzi Jets?

Cleaning your Jacuzzi jets is crucial for several reasons:

Prevent Bacterial Growth


Stagnant water and dirt buildup in the jets can create a breeding ground for harmful bacteria, including Legionella, which can lead to Legionnaires' disease. Frequent cleaning keeps these health dangers away.

Maintain Optimal Performance


Over time, mineral deposits and soap scum can accumulate in the jets, restricting water flow and reducing their massaging power. Cleaning ensures that your Jacuzzi jets function at their best, providing the ultimate hydrotherapy experience.

Extend the Lifespan of Your Jacuzzi


Neglecting to clean your Jacuzzi jets can lead to corrosion and wear, potentially shortening the lifespan of your bathtub and its components. Regular maintenance is key to prolonging the life of your investment.

Eliminate Unpleasant Odors


Mold, mildew, and bacteria can cause unpleasant odors to emanate from your Jacuzzi jets. Cleaning eliminates these odors, ensuring a fresh and inviting bathing experience every time.


By prioritizing the cleanliness of your Jacuzzi jets, you not only safeguard your health but also preserve the beauty and functionality of your bathtub for years to come.


Signs That Your Jacuzzi Jets Need Cleaning

Even if you can't see visible signs of dirt or buildup, there are several indicators that your Jacuzzi jets need a good cleaning:

Reduced Water Flow


If you notice a decrease in the water pressure or intensity of the jets, it could be a sign that mineral deposits or debris are obstructing the jet openings.

Discoloration or Staining


If you spot discoloration, stains, or grimy buildup around the jet openings or on the tub surface, it's a clear indication that cleaning is long overdue.

Unpleasant Odors


If you detect musty, mildewy, or foul odors emanating from the jets, it could be a sign of bacterial growth or trapped debris.

Visible Debris or Slime


If you can see visible debris, slime, or biofilm accumulating around the jet openings, it's a telltale sign that thorough cleaning is required.

Noisy Jets


If your Jacuzzi jets are making unusual noises, such as gurgling or rattling sounds, it could be due to trapped debris or mineral buildup.


By staying vigilant and recognizing these signs, you can address the issue promptly and prevent further buildup or damage to your Jacuzzi jets.


Tools and Materials Needed for Cleaning Jacuzzi Jets

Make sure to collect the following items before starting the cleaning:


Having the right tools and materials on hand will make the cleaning process more efficient and effective.


Step-by-Step Guide on Cleaning Jacuzzi Jets in the Bathtub

Follow these steps to achieve a thorough and effective cleaning of your Jacuzzi jets:

1. Prepare the Bathtub


To prepare the bathtub, start by draining any remaining water, then remove any removable jet covers or escutcheons for better access, and finally, use a vacuum or shop vacuum to clear any visible debris or water from the jets and tub.


2. Create a Cleaning Solution


Mix equal parts of warm water and white vinegar in a bucket or spray bottle for a natural cleaning solution. You can also make a baking soda paste by combining baking soda with a little water until it forms a thick consistency.

3. Apply the Cleaning Solution


Spray or apply the vinegar solution or baking soda paste directly onto the jet openings and surrounding areas, then let it sit for 10-15 minutes to break down mineral deposits and soap scum.

4. Scrub the Jets


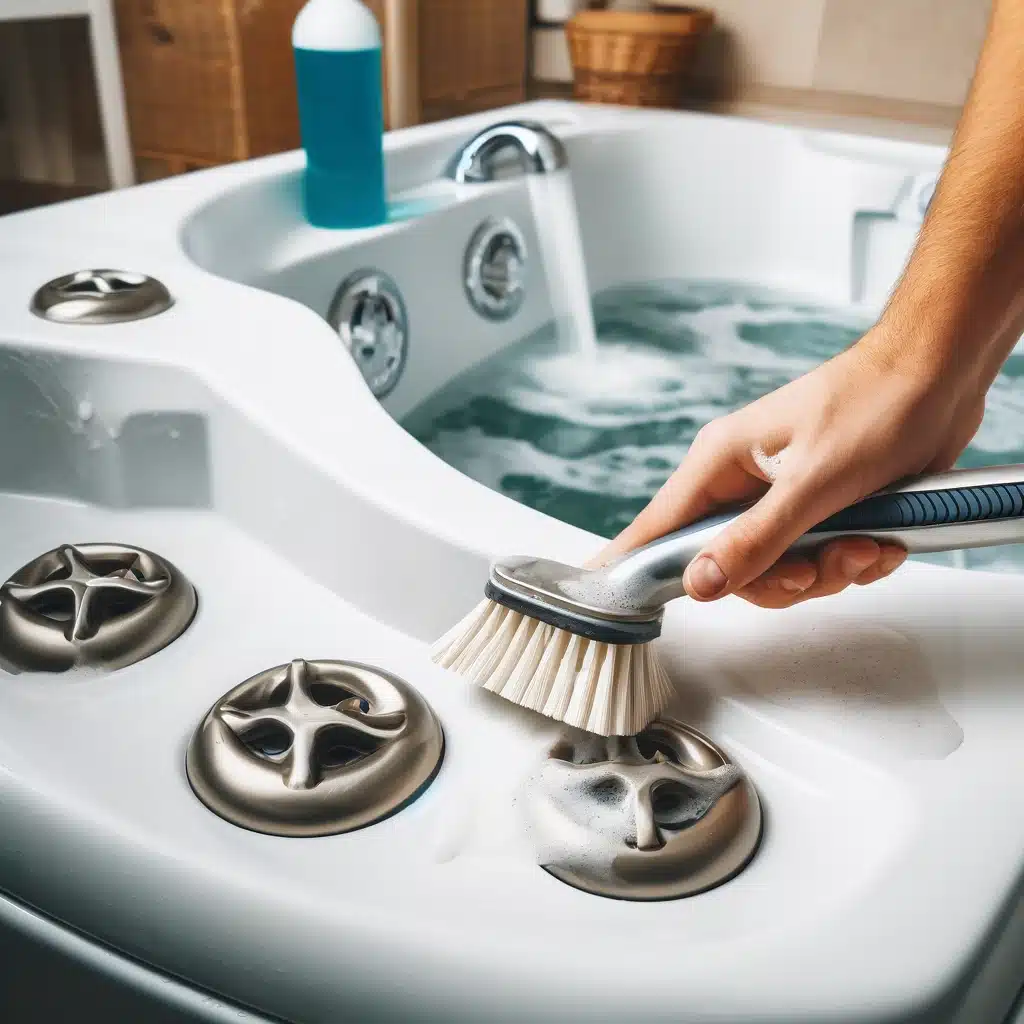
Use your cleaning brushes to scrub the jet openings and surrounding areas vigorously to remove any buildup or grime; for stubborn deposits, use a small tool like pliers or tweezers to remove debris stuck in the jets.

5. Rinse Thoroughly


After scrubbing, rinse the jets and tub thoroughly with clean water to remove any remaining cleaning solution or debris, and use a vacuum or shop vacuum if needed to remove excess water from the jets and tub.

6. Disinfect


If desired, disinfect the jets using a diluted bleach solution or a disinfectant cleaner as per the manufacturer's instructions; apply the solution to the jets and surrounding areas, let it sit for the recommended time, and then rinse thoroughly.

7. Dry and Reassemble


Use clean, dry cloths or towels to thoroughly dry the jets and tub, ensuring all surfaces are completely dry, then replace any removable jet covers or escutcheons.


8. Maintain and Repeat


To prevent future buildup, periodically run the jets with a jet cleaner or vinegar solution and repeat the full cleaning process every few months or as needed, depending on usage and water quality.


By following these steps diligently, you will ensure that your Jacuzzi jets remain clean, efficient, and ready to provide you with a luxurious bathing experience.


Tips for Maintaining Clean Jacuzzi Jets

While regular cleaning is essential, there are several tips you can follow to help maintain the cleanliness of your Jacuzzi jets between deep cleanings:

Use Jet Cleaners


Consider using specialized jet cleaners or cleaning solutions designed specifically for Jacuzzi jets. These products can help prevent buildup and make regular maintenance easier.

Flush with Vinegar


Periodically flushing your Jacuzzi jets with a vinegar solution can help dissolve mineral deposits and prevent buildup.

Wipe Down After Use


After each use, wipe down the jets and surrounding areas with a clean, damp cloth to remove any soap residue or debris.

Maintain Proper Water Chemistry


Ensuring bathtub water has the correct pH balance and chemical levels can help prevent mineral buildup and bacterial growth.

Use a Tub Cover


Covering your bathtub when not in use can help prevent dust, dirt, and debris from accumulating in the jets and tub.

Avoid Harsh Chemicals


Steer clear of harsh chemical cleaners, as they can potentially damage the jets or tub surfaces over time. Opt for gentler, natural cleaning solutions whenever possible.

Schedule Regular Maintenance


Set a reminder to perform a deep cleaning of your Jacuzzi jets every few months or as recommended by the manufacturer.


By incorporating these tips into your routine, you can help extend the time between deep cleanings and ensure that your Jacuzzi jets remain in pristine condition for years to come.


Common Mistakes to Avoid When Cleaning Jacuzzi Jets

While cleaning your Jacuzzi jets may seem straightforward, there are a few common mistakes that can potentially cause damage or make the process less effective:

Using Abrasive Cleaners or Tools


Harsh abrasive cleaners or scrubbing tools can scratch or damage the delicate surfaces of your Jacuzzi jets and tub. Always opt for gentle, non-abrasive cleaning solutions and soft-bristled brushes.

Neglecting to Remove Debris


Failing to remove debris or buildup from the jet openings can lead to clogging and reduced water flow. Be sure to thoroughly clean and inspect each jet opening during the cleaning process.

Overusing Chemicals


While disinfectants and bleach solutions can be effective for deep cleaning, overusing them can cause damage to the jets and tub surfaces over time. Always follow the recommended dilution ratios and rinse thoroughly after use.

Forgetting to Dry Completely


Leaving moisture or standing water in the jets or tub can lead to the growth of mold, mildew, and bacteria. Ensure surfaces are completely dry before reassembling the jets or covering the tub.

Skipping Regular Maintenance


Refrain from regular cleaning and maintenance to avoid excessive buildup, making the cleaning process more difficult and potentially damaging the jets or tub over time.

Using Incorrect Tools or Techniques


Using the wrong tools or improper cleaning techniques can potentially damage the jets or tub surfaces. Always follow the manufacturer's recommended cleaning methods and use the appropriate tools.


By avoiding these common mistakes, you can ensure that your Jacuzzi jets are cleaned effectively and safely without causing unnecessary damage or complications.


Alternative Methods for Cleaning Jacuzzi Jets

While the traditional cleaning methods using vinegar, baking soda, and disinfectants are effective, there are alternative methods you can explore for cleaning your Jacuzzi jets:

Ultrasonic Cleaning


Some specialized companies offer ultrasonic cleaning services for Jacuzzi jets. This method uses high-frequency sound waves to dislodge and remove even the most stubborn buildup and debris.

Enzyme Cleaners


Enzyme-based cleaners are designed to break down organic matter, such as soap scum, hair, and other residues. These cleaners can be particularly effective for removing buildup in hard-to-reach areas of the jets.

Steam Cleaning


Using a steam cleaner can be an effective way to loosen and remove mineral deposits and grime from Jacuzzi jets. The high-temperature steam helps dissolve buildup without the need for harsh chemicals.

Citric Acid Solutions


Citric acid is a natural and effective cleaning agent that can help dissolve mineral deposits and soap scum. You can create a citric acid solution by mixing it with warm water and applying it to the jets.

Pressure Washing


For extremely stubborn buildup or hard-to-reach areas, you may consider hiring a professional pressure washing service. The high-pressure water can effectively blast away even the most stubborn deposits.

Specialized Jet Cleaning Tools


There are various specialized tools and accessories designed specifically for cleaning Jacuzzi jets, such as jet-cleaning wands or brushes with long, flexible handles.


Before trying any alternative cleaning methods, be sure to research and follow the manufacturer's recommendations to avoid damaging your Jacuzzi jets or tub surfaces.


Professional Cleaning Services for Jacuzzi Jets

If you prefer a hassle-free approach or your Jacuzzi jets require more intensive cleaning, you may consider hiring professional cleaning services. These services offer several advantages:

Expertise and Experience


Professional cleaning companies have the expertise and experience to handle even the most challenging Jacuzzi jet cleaning tasks. They understand the intricacies of different jet systems and tub materials, ensuring a thorough and safe cleaning process.

Advanced Equipment and Techniques


Professional cleaners often have access to advanced equipment and techniques, such as high-pressure washers, ultrasonic cleaners, or specialized jet cleaning tools, which can achieve a deeper and more effective clean.

Time-Saving Convenience


Hiring a professional service can save you valuable time and effort, especially if you have a busy schedule or find the cleaning process daunting.

Guaranteed Results


Reputable cleaning companies typically offer guarantees or warranties on their services, ensuring that you are satisfied with the results, or they will re-clean if necessary.

Preventative Maintenance


Many professional cleaning services offer preventative maintenance programs, which can help extend the lifespan of your Jacuzzi jets and tub by keeping them in optimal condition.


When considering professional cleaning services, be sure to research reputable companies in your area, read reviews, and obtain quotes to find the best option for your needs and budget.


Frequently Asked Questions

How do I clean the inside of my Jacuzzi?

Fill the tub with hot water, add vinegar or dish soap, run the jets for 15 minutes, drain, scrub the tub and jets, then rinse. Use a jet cleaner occasionally for a deeper clean.

Is it OK to clean a bathtub with vinegar?

Yes, vinegar is a great natural cleaner for bathtubs. Mix with water, spray, let it sit for 10-15 minutes, then scrub and rinse. It removes grime, soap scum, and bacteria effectively without harsh chemicals.

How do you clean hot tub jets without draining?

Add vinegar or a hot tub cleaner to the water, run the jets for 15 minutes, scrub around the jet openings, and rinse by running the jets with fresh water for another 10 minutes.

Is bleach safe for jetted tubs?

Bleach can be used carefully, diluted with water, to disinfect jetted tubs. Run the jets for 5-10 minutes, rinse thoroughly, and avoid frequent use. Gentler, Jacuzzi-safe cleaners are better for regular maintenance.

How often should I clean my Jacuzzi jets?

Clean Jacuzzi jets every 1-2 months or when you notice grime, reduced jet pressure, or odors. Regular cleaning helps keep jets running smoothly and extends the life of your Jacuzzi.


Conclusion

Keeping your Jacuzzi jets clean isn't just about appearance, it's about creating a safe, relaxing, and spa-like retreat right in your own home. Regular maintenance not only ensures smooth water flow and eliminates unpleasant odors but also keeps bacteria and grime at bay. While this 2024 guide helps you take care of the basics, why not take it a step further and let the professionals handle it? 


At Ft. Worth Refinishing, we specialize in bringing bathtubs and Jacuzzis back to life with expert cleaning, refinishing, and maintenance services. Don’t settle for less when it comes to your comfort and hygiene. Contact us today, and let’s make your bathtub feel brand new again!

End Note

At Ft. Worth Refinishing, we are all about transforming your bathroom spaces into something extraordinary with our expert refinishing services. Whether you need bathroom vanity refinishing or giving your bathtub refinishing a complete makeover, we are committed to delivering top-quality techniques to bring a new level of elegance to your home. Explore Our Services to see all that we offer, from countertop refinishing to tile reglazing, and check out our Gallery to see stunning examples of our work.


We proudly serve communities throughout the area, so be sure to check out our Areas We Serve to find out if we’re in your neighborhood. Curious about who we are and why we do what we do? Visit our About Us page to learn more about our dedication to craftsmanship and customer satisfaction.


Stay updated with the latest bathroom trends, refinishing tips, and inspiration by following our Blog. Like our page on Facebook for the newest updates, customer feedback, and interesting content. Ready to give your bathroom a fresh new look? Visit our Contact Us page to send us a message. At Ft. Worth Refinishing, we’re here to make your bathroom shine, let’s get started today!


Step-by-Step 2024 Guide on Refinishing Granite Countertops at Home

Are your granite countertops looking a little worse for wear? Time to rejuvenate their sparkle and beauty! Granite countertops are a popular choice for homeowners because of their durability and timeless appeal. But let's face it, even the sturdiest surfaces can start to show signs of wear over time.


Imagine walking into your kitchen and seeing your countertops gleaming like new again. The good news is that you don't need to invest in costly replacements to achieve this transformation. Refinishing granite countertops is a fantastic way to restore their luster and extend their lifespan.


In this comprehensive guide, we'll take you through the entire process of refinishing granite countertops at home. You'll gain valuable insights, step-by-step instructions, and expert tips to ensure your countertops look as good as the day they were installed. Say goodbye to dull, stained, or scratched surfaces and hello to a fresh, professional finish.


Benefits of Refinishing Granite Countertops


Refinishing granite countertops offers several advantages over replacement, including:


Understanding the Condition of Your Granite Countertops


Before diving into the refinishing process, it's essential to evaluate the current state of your granite countertops. This step is crucial to determine the best approach and ensure a successful outcome. Here's what to look for:


Tools and Materials Needed for Refinishing Granite Countertops


To ensure a successful refinishing project, gather the following tools and materials:


Having the right tools and materials on hand will make the refinishing process smoother and more efficient, ensuring a professional-looking result.


Step-by-Step Guide to Refinishing Granite Countertops

1. Preparing the countertop surface


Before starting the refinishing process, it's essential to prepare the countertop surface properly. Follow these steps:


Thorough prep work ensures the new finish sticks correctly and looks flawless.

2. Cleaning the countertop


Once the surface is clear and protected, it's time to deep clean the granite countertops. Follow these steps:


Thorough cleaning is essential to ensure that the new finish adheres properly and doesn't trap any dirt or debris beneath it.


3. Repairing any damages


If your granite countertops have any cracks, chips, or other damages, it's important to address them before proceeding with the refinishing process. Follow these steps:


Addressing any existing damages will ensure a smooth and even surface for the new finish, preventing further issues down the line.

4. Sanding the countertop


Sanding is a crucial step in the refinishing process, as it helps create a smooth, even surface for the new finish to adhere to. Follow these steps:


Proper sanding is essential for creating a smooth, even surface that will allow the new finish to adhere properly and look its best.

5. Applying the sealant


Once the countertop surface is smooth and clean, it's time to apply the new sealant or finish. Follow these steps:


Proper application of the sealant or polish is crucial for achieving a long-lasting, beautiful finish on your refinished granite countertops.

6. Buffing and polishing the countertop


After the final coat of sealant or polish has dried completely, it's time to buff and polish the countertop for a high-shine, professional-looking finish. Follow these steps:


Proper buffing and polishing will bring out the natural beauty and luster of your refinished granite countertops, ensuring a stunning and long-lasting result.


Maintenance Tips for Keeping Your Refinished Granite Countertops Looking Great


After investing time and effort into refinishing your granite countertops, it's essential to maintain them properly to ensure their longevity and beauty. Don't forget these essential maintenance tips:


  1. Regular cleaning: Clean your countertops regularly with a pH-neutral granite cleaner and a soft cloth or sponge. Avoid abrasive cleaners or harsh chemicals that can damage the sealant or finish.
  2. Spill management: Wipe up spills promptly to prevent staining or etching. Use coasters or trivets under hot dishes or appliances to protect the surface.
  3. Resealing: Depending on the type of sealant used and the amount of wear and tear, you may need to reseal your countertops every one to two years to maintain their protection and shine.
  4. Avoid abrasives: Refrain from cutting directly on the countertop surface, and use cutting boards or mats to prevent scratches or gouges.
  5. Gentle cleaning techniques: Use non-abrasive cleaning pads or soft cloths when cleaning your countertops to avoid scratching or dulling the finish.


By following these maintenance tips, you can ensure that your refinished granite countertops remain in pristine condition for years to come.


Common Mistakes to Avoid When Refinishing Granite Countertops


While refinishing granite countertops can be a rewarding DIY project, it's essential to be aware of common mistakes that can compromise the results. Here are some pitfalls to avoid:


By being aware of these common mistakes and taking the necessary precautions, you can increase your chances of achieving a successful and long-lasting refinishing project.


Professional Refinishing vs. DIY Refinishing


While DIY refinishing can be a cost-effective and rewarding option for some homeowners, it's important to consider the pros and cons of professional refinishing as well. Use this comparison to help you decide wisely:

DIY Refinishing


Professional Refinishing


Ultimately, the choice between DIY and professional refinishing will depend on your skill set, budget, time constraints, and desired level of perfection. If you're confident in your abilities and willing to invest the time and effort, DIY refinishing can be a rewarding and cost-effective option. However, if you prioritize convenience, guaranteed results, and peace of mind, hiring a professional refinishing service may be the better choice.


Frequently Asked Questions

How long does the refinishing process typically take?


The duration of the refinishing process can vary depending on the size of the countertop area and the extent of repairs needed. Generally, a DIY refinishing project can take anywhere from one to three days, while professional refinishing may be completed in a single day.

Can any type of granite countertop be refinished? 


Most types of granite countertops can be refinished, including polished, honed, and leathered finishes. However, it's important to assess the condition of the countertop and address any significant damage or structural issues beforehand.

How long does the new finish last? 


With proper application and maintenance, a high-quality sealant or polish can last anywhere from one to five years before needing to be reapplied. Regular resealing and proper care can extend the lifespan of the refinished surface.

Is refinishing granite countertops a permanent solution? 


While refinishing can significantly extend the lifespan of your granite countertops, it is not a permanent solution. Over time, the new finish may wear down, and the countertops may need to be refinished again or eventually replaced.

Can refinishing change the color of my granite countertops? 


Yes, refinishing can allow you to change the color or finish of your granite countertops. However, it's important to choose a sealant or polish that is compatible with the new desired color and follow the manufacturer's instructions carefully.


Conclusion


Refinishing granite countertops is an excellent way to breathe new life into your kitchen or bathroom without the need for costly replacements. By following the step-by-step guide outlined in this article, you can achieve a professional-looking finish and extend the lifespan of your countertops.


Remember, proper preparation, attention to detail, and adherence to manufacturer instructions are key to a successful refinishing project. If you're unsure about tackling the project yourself, consider hiring a professional refinishing service in Fort Worth, TX like Ft. Worth Refinishing, renowned for their expertise and commitment to delivering outstanding results in the Fort Worth, TX area.


Whether you choose to DIY or seek professional assistance, refinishing your granite countertops is an investment that can enhance the beauty and value of your home for years to come.


The Ultimate Guide to Refinishing Granite Countertops

Welcome to our ultimate guide on how to breathe new life into your granite countertops! Whether your kitchen needs a little refresh or a complete makeover, refinishing granite countertops can greatly transform the heart of your home. Granite, known for its durability and timeless beauty, sometimes requires a facelift to restore its sparkle. This guide will walk you through expert tips and techniques, ensuring your countertops become the centerpiece of your kitchen renovation. So, grab your tools, and let's dive into the world of refinishing granite countertops!


Understanding Granite Countertops


Granite countertops have become a cornerstone of luxury and durability in kitchens worldwide. But before we dive into the process of refinishing granite countertops, let's explore what makes granite so special.

Properties of Granite


Granite is a natural stone primarily made up of quartz, feldspar, and mica. This combination results in a hard and dense material, perfect for the rough and tumble of kitchen life. One of granite's standout features is its crystalline structure, which gives it a unique depth and beauty by distinctively reflecting light. Moreover, granite is heat resistant, a valuable property for a kitchen work surface, and when sealed correctly, it's also resistant to stains and bacteria.

Benefits of Granite Countertops


Choosing granite countertops for your kitchen comes with a plethora of benefits. First and foremost, their durability is unmatched. They can take a lot of wear and tear without showing signs of distress, assuming they are properly maintained. Secondly, each piece of granite is unique, adding an individualistic charm to your kitchen. Additionally, granite adds value to your home. It's a material that potential homebuyers love for its beauty and durability, making it a fantastic long-term investment for your house.


Reasons for Refinishing Granite Countertops


Even with granite's impressive durability and timeless beauty, there may come a time when refinishing becomes necessary. Several reasons can lead you to consider this option.

Wear and Tear


Over the years, even the sturdiest materials show signs of use. Granite countertops are no exception. Regular use can eventually wear down the sealant, leading to a dulled surface. While granite itself is hard to scratch, repeated exposure to abrasive materials or heavy objects can lead to minor damages that affect its overall appearance.

Outdated Appearance


Trends in interior design are always evolving. What was in vogue a decade ago might not suit your current aesthetic. Your granite countertops themselves are timeless, but their finish or the way they've been cut might feel outdated. Refinishing granite countertops allows you to update the look without the need for a full countertop replacement.

Stains and Damage


Despite granite's resistance to staining, certain substances can leave marks if the surface isn't properly sealed or if the sealant has worn off over time. Common culprits include wine, oil, and coffee. Physical damages, like chips or cracks, can also occur, particularly around the sink or edges. Refinishing granite countertops can address these issues, restoring the surface to its original glory or even improving upon it.


In summary, granite countertops offer a blend of beauty, durability, and functionality that few other materials can match. However, the need for refinishing might arise due to wear and tear, an outdated appearance, or specific stains and damage. Fortunately, with the right approach, your granite countertops can be brought back to life, ensuring they remain a centerpiece in your kitchen for many more years.


Preparing for Refinishing


Before you jump into the actual process of refinishing granite countertops, preparing your workspace is crucial. A well-prepared foundation ensures the refinishing process goes smoothly, producing those long-lasting, gleaming results we all love.

Cleaning the Countertops


First things first, give your granite countertops a thorough cleaning. Remove any items on the countertops, including small appliances, utensils, and decorative pieces. Use a gentle cleaner that's safe for granite—avoid acidic or abrasive cleaners as they can damage the stone. Wipe down the surfaces with a soft cloth or sponge to remove any dirt, grime, and stains. Make sure the countertops are completely dry before moving to the next step. This step is critical for ensuring the refinishing products adhere properly.

Choosing the Right Refinishing Products


Choosing the correct refinishing products is key to achieving professional-looking results. Opt for products specifically designed for use on granite to ensure compatibility and prevent damage. Look for refinishing kits that include a sealant, which is essential for protecting the stone after refinishing. Read product reviews and consult with professionals if unsure which products to choose. Remember, high-quality products will yield high-quality finishes.

Gathering Necessary Tools


With the right products in hand, gather the tools you'll need for the job. This includes sandpaper or a power sander for the initial smoothing process, protective gear (goggles, dust mask, gloves), cloths or sponges for application, and brushes or rollers suitable for your chosen products. Having all your tools and materials at the ready will streamline the refinishing process, making it more efficient and enjoyable.


Steps to Refinish Granite Countertops


With your preparation complete, you're now ready to tackle the refinishing process. This section will guide you through each step, from sanding the surface to sealing the countertops for lasting protection.

Sanding the Surface


Sanding is the first step in the refinishing process, removing scratches, dullness, and stains from the surface. Start with a coarse-grit sandpaper or use a power sander for larger surfaces. Sand the countertops evenly, applying gentle pressure. Progress to finer grits until the surface is smooth to the touch. Clean the dust off the countertops thoroughly after sanding, ensuring a clean surface for the refinishing solution.

Applying the Refinishing Solution


After sanding, it’s time to apply the refinishing solution following the manufacturer's instructions. Use a brush, roller, or sponge for application, depending on the product's consistency and your preference. Apply the solution evenly, covering the entire surface. Some products may require multiple coats, so be patient and allow each layer to dry completely before applying the next. This step revitalizes the appearance of your granite, restoring its lustrous shine.

Sealing the Countertops


The final step in the refinishing process is applying the sealant, which protects the granite from staining and damage. Choose a high-quality sealant for best results. Apply the sealant evenly across the surface, following the product's directions regarding drying times and the number of coats required. Once sealed, allow the countertops to cure for the recommended duration before using them. This step not only enhances the durability of your granite countertops but also makes them easier to clean and maintain.


Following these steps for refinishing your granite countertops will transform your kitchen space, leaving you with stunning results that are both beautiful and enduring.


Tips for a Successful Refinishing Project

Refinishing granite countertops can breathe new life into your kitchen, transforming the space with minimal expense compared to a full renovation. To ensure the process is as smooth and successful as possible, here are some expert tips to follow.

Maintaining Proper Ventilation


When you start your refinishing project, one of the first things to prioritize is proper ventilation. The chemicals and products used during the refinishing process can emit strong odors and potentially harmful fumes. Opening windows, using fans, or even working with an air purifier can help keep the air in your kitchen fresh and safe to breathe. This not only protects your health but also helps the products dry and settle better.

Being Patient with the Process


Patience truly is a virtue when it comes to refinishing granite countertops. It might be tempting to rush through each step to see the final result, but taking your time ensures each phase of the project is completed correctly. This includes allowing ample time for cleaning, sanding, polishing, and sealing. Rushing might lead to missed spots or uneven finishes that could detract from the beauty of your countertops.

Ensuring Even Application


One key to achieving a professional-looking finish is ensuring the even application of each product used during the refinishing process. This applies to cleaners, sealers, and polishes. Make sure to apply these products following the manufacturer's instructions, using consistent strokes and paying close attention to all areas, including edges and corners. Even application results in a smooth, flawless finish that fully showcases the natural beauty of your granite countertops.


Common Mistakes to Avoid When Refinishing Granite Countertops


Even with the best intentions, there are common pitfalls that many encounter during the granite countertop refinishing process. Being aware of these can help you steer clear and ensure a successful project.

Using Harsh Chemicals


One common mistake in refinishing granite countertops is the use of harsh chemicals for cleaning or attempting to strip the old sealer. Granite, while durable, is susceptible to damage from acidic or abrasive cleaners. These can etch the surface or degrade the sealant, leaving your countertops vulnerable to staining and damage. Always opt for products specifically designed for use on granite and follow the instructions carefully.

Skipping the Sealing Step


Sealing is a critical step in the refinishing process that should never be skipped. A top-quality sealer protects your granite countertops from stains, spills, and wear, extending their lifespan and beauty. Make sure to apply a sealer after polishing and give it enough time to penetrate and dry completely before using your countertops again.

Rushing the Process


Rushing through any part of the process for refinishing granite countertops can lead to disappointing results. Whether it's not allowing enough time for products to dry, skipping steps to save time, or not thoroughly preparing the surface before beginning, hurrying can result in a finish that doesn't last or looks uneven. It's important to schedule your project when you have ample time to devote to each step, ensuring your granite countertops come out looking their best.


Installing New Granite Countertops


Sometimes, a refinish just won't cut it. Whether it's due to extensive damage, a change in personal style, or a desire for a complete kitchen transformation, installing new granite countertops could be the solution. This option allows you to:


Though this route can be more expensive compared to refinishing granite countertops, it offers a fresh start and a tailor-made solution that fits your exact preferences and needs.


Conclusion


Refinishing granite countertops services in Fort Worth TX boasts an array of benefits, from cost savings to environmental friendliness. However, it's essential to consider all available options based on your specific circumstances, goals, and the condition of your countertops. Whether you decide to refinish, seek professional help, or go for a complete replacement, each path offers unique advantages aimed at rejuvenating your kitchen space. Paying attention to these details ensures that your kitchen remains a vibrant, welcoming area of your home for many years to come. Ultimately, the choice is yours, and it's all about what works best for your lifestyle, budget, and aesthetic preferences.


Expert Granite Countertop Refinishing by Fort Worth Refinishing


If you're considering refinishing granite countertops and want to ensure they look their best for years to come, Fort Worth Refinishing is your go-to partner. Our experienced team specializes in providing exceptional countertop refinishing services, committed to revitalizing the beauty of your granite surfaces. We prioritize your investment, aiming to deliver results that surpass your expectations. Our process is meticulously designed to enhance the allure of your granite countertops, making them the highlight of your kitchen. Choosing Fort Worth Refinishing means partnering with a team that places utmost importance on quality and customer satisfaction. Whether you're undertaking a full kitchen renovation or simply wish to rejuvenate your granite countertops, we're here to help your kitchen shine like never before. Contact us today to begin the transformation.


Taking Your Countertop to the Next Level: A Comprehensive Guide to Countertop Refinishing

Countertop refinishing is the art of giving your worn-out countertop a new lease of life without the need for complete replacement. It is a process that combines technical expertise, aesthetics, and functionality to transform your countertop into a masterpiece of elegance and durability. Over the years, I've seen how this simple yet impactful home improvement technique can totally revamp a kitchen or bathroom space, adding value to the property.


What sets countertop refinishing apart from the many other home improvement methods available? It's amazing how a simple transformation can turn your outdated or unattractive countertop into a stylish and functional surface. This is achieved by repairing any damages and applying a new finish to the existing countertop. A brand-new-looking countertop without the expensive replacement cost.


This guide aims to provide you with a complete understanding of countertop refinishing. It will help you get familiarized with the process and concepts involved. Whether you are a homeowner looking to upgrade your kitchen, a property manager trying to enhance the value of a rental property, or a do-it-yourself enthusiast seeking knowledge, this guide is for you.


The Benefits of Countertop Refinishing


Refurbishing your kitchen or bathroom countertop is more than just a cosmetic upgrade; it's a smart, strategic move for homeowners. Choosing to refinish a countertop is becoming a popular choice among homeowners for its practical and cost-effective benefits. Let's delve into the key benefits that make countertop refinishing an astute choice for your next home project.

Cost-Effectiveness


One of the most compelling reasons to choose countertop refinishing is its cost-effectiveness. Renovating a kitchen or bathroom is known to be pricey, and the cost of completely replacing countertops can be a significant portion of your budget. This cost escalates further when you factor in the labor charges for installation and the potential need to alter your existing space to accommodate a new countertop.


In contrast, countertop refinishing offers a more economical alternative. By revamping your existing countertop, you can achieve a fresh, updated look at a fraction of the replacement cost. This process involves repairing any damage and applying new surface treatments, resulting in a brand-new countertop. The affordability of refinishing makes it an ideal solution for homeowners looking to upgrade their space without breaking the bank.

Minimal Disruption


Another major advantage of countertop refinishing is the minimal disruption it causes to your daily life. A full countertop replacement is a time-consuming process. It often involves extensive demolition, removal of the old countertop, and installation of the new one. This process can take several days to weeks, causing significant inconvenience in your household.


Countertop refinishing, on the other hand, is a much less invasive process. It typically takes only a day or two to complete, significantly reducing the time your kitchen or bathroom is out of commission. The process is also cleaner and quieter, with far less mess and noise than a full replacement. This efficiency means you can enjoy your new-look countertop sooner and with less hassle.

Eco-Friendly Choice


In today's environmentally-conscious world, countertop refinishing is an excellent option for those looking to make sustainable choices. When you opt to refinish rather than replace your countertop, you contribute to reducing waste. A full replacement often means the old countertop is in a landfill, contributing to environmental degradation.


By choosing to refinish, you're extending the life of your existing countertop and reducing your carbon footprint. This approach aligns with sustainable living practices, making it a responsible and eco-friendly home improvement choice. Refinishing benefits you as a homeowner and contributes positively to the broader goal of environmental conservation.


When Should You Consider Countertop Refinishing?


It's important to know when to consider countertop refinishing. If your countertop shows signs of wear and tear, such as scratches, chips, or burns, or if it simply looks outdated, consider refinishing. Not only will it enhance the aesthetic appeal of your space, but it will also extend the lifespan of your countertop.


Countertop refinishing is also a great option when you're on a budget. Refinishing can give you the desired results without breaking the bank if you want to upgrade your kitchen or bathroom but can only afford to replace part of the countertop. It's a cost-effective way to add value to your property without a major investment.


Refinishing your countertop can boost its market value if you're considering selling your home. A well-maintained and visually appealing kitchen or bathroom can be a major selling point. A freshly refinished countertop can make the space look newer and more attractive to potential buyers.


The Process of Countertop Refinishing


Countertop refinishing is a straightforward and effective way to give your kitchen or bathroom a new look. Here's a streamlined guide to the process:

Cleaning the Countertop


The initial step involves thoroughly cleaning the countertop. This removes dirt, grease, and grime, ensuring a clean surface for refinishing.

Repairing Damages


Next, any chips, cracks, or burns on the countertop are repaired. This step is crucial for a smooth and even surface.

Sanding


The countertop is then sanded down. This prepares the surface by smoothing out any rough spots, making it ready for the new finish.

Applying the Finish


The new finish is applied in several layers. You can choose different types of finishes, like glossy for a modern look or matte for a traditional style.

Drying and Curing


Finally, the countertop needs to dry and cure, which usually takes a few days. This is when the finish hardens and becomes durable.


In conclusion, countertop refinishing is a cost-effective, less disruptive way to update your kitchen or bathroom. It involves cleaning, repairing, sanding, finishing, and drying for a like-new appearance.

Materials Used in Countertop Refinishing


The materials used in countertop refinishing can vary based on the type of countertop and the desired result. However, some common materials include primer, base coat, decorative finish, and top coat. All these materials work together to create a durable and attractive finish.


Primer is used to prepare the surface of the countertop for the new finish. It helps the base coat adhere better to the surface. The base coat is the first layer of the new finish. It provides the color and the foundation for the decorative finish.


The decorative finish adds the desired texture and pattern to the countertop. For example, if you want a marble-like finish, a specific technique will be used to create the veins and swirls characteristic of marble. The top coat seals the decorative finish and adds durability to the countertop. It also provides the desired level of gloss or matte finish.


How to Choose the Right Countertop Refinishing Company


Choosing the right countertop refinishing company is crucial to ensure the success of your project. Search for a business that boasts a strong reputation and favorable customer feedback. Review their portfolio to examine samples of their past projects. This can give you an idea of their expertise and the quality of their work.


It's also important to consider the company's experience. Countertop refinishing requires skill and knowledge, which comes with experience. A company that has been in the business for a long time will likely deliver better results than a newcomer.


Lastly, consider the cost. While finding a company that fits your budget is important, keep quality high to save a few dollars. Remember, you get what you pay for. A cheap service might cost you more in the long run if the work needs to be done properly.


DIY Countertop Refinishing: Pros and Cons


DIY countertop refinishing can be rewarding if you're handy and enjoy doing things yourself. It lets you choose the materials, colors, and finishes you want. Plus, it can save you money. However, it also comes with its share of challenges.


Firstly, it requires time, effort, and patience. Each step must be done carefully and meticulously, from prepping the countertop to applying the finish. Secondly, it requires skill. If you're not experienced, you might have a less-than-perfect result. Also, you risk damaging the countertop if you're not careful.


On the other hand, hiring a professional to do the job can ensure a seamless and hassle-free experience. They have the right skills, experience, and equipment to do the job. Plus, they can offer valuable advice on the best materials and finishes for your countertop.

How to Care for Your Refinished Countertop


Once your countertop is refinished, it's important to care for it properly to prolong its life. Avoid placing hot pots and pans directly on the surface, as it can cause damage. Use a trivet or a hot pad instead. Also, avoid using abrasive cleaners or pads as they can scratch the surface. For cleaning, opt for a gentle, non-abrasive cleaning solution and use a soft cloth.


Wipe up spills immediately to prevent staining. Even though the new finish is stain-resistant, certain substances like red wine, coffee, or beet juice can stain if left on the surface for too long. Regularly clean your countertop to keep it looking its best.


The Cost of Countertop Refinishing


The cost of countertop refinishing can vary depending on several factors, such as the size of the countertop, the materials used, the complexity of the job, and the company you choose. However, it's generally much less expensive than replacing the countertop.


On average, you can expect to pay anywhere from $200 to $600 for a professional countertop refinishing. This encompasses both the expenses for materials and labor. The cost can be even lower if you choose to do it yourself. However, you must also consider the time and effort you'll need to put in.


Conclusion


Countertop refinishing is an excellent solution for homeowners who want to upgrade their kitchen or bathroom without the cost and hassle of a complete countertop replacement. It's a simple, cost-effective, and environmentally friendly way to breathe new life into your space.


Whether you opt for a DIY project or hire a professional, making informed decisions is important. Understand the process, choose the right materials, and care for your refinished countertop properly to ensure it lasts for years to come.


When cleaning products no longer leave your counters looking spotless, you likely need them refinished for more years of use. Call Forth Worth Refinishing for countertop refinishing services in Texas.

SOCIALICON