
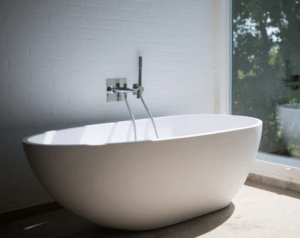
Knowing how to refinish the bathtub is a fantastic way to bring back its shine without the expense of getting a new one. Over time, tubs can become scratched, stained, or worn out, but refinishing them can return their original shine. This step-by-step guide will show how simple it is to transform your bathtub into something that looks as good as new.
Refinishing a bathtub does not require professional skills or expensive materials. With just a few essential tools and some patience, anyone can complete this DIY project. The process involves thoroughly cleaning the tub, fixing any damage, applying a fresh coat of refinishing material, and letting it cure. In just a few hours, the tub will look refreshed and smooth again.
Say goodbye to the hassle of remodeling costs and hello to a fresh, rejuvenated bathtub. Refinishing not only saves you money but also enhances the overall look of your bathroom. Get ready to tackle this DIY project confidently, and discover just how rewarding it is to transform your bathtub into a sparkling centerpiece of your bathroom!
Why Refinish Your Bathtub?
Refinishing a bathtub is an affordable, practical solution to restore its appearance without the cost and hassle of replacement. Tubs can develop chips, stains, or discoloration over time, but refinishing is more straightforward and cost-effective than a full replacement.
With refinishing, you can:
- Save money compared to buying a new tub.
- Avoid the inconvenience of extensive demolition and plumbing work.
- Extend the lifespan of your bathtub for several more years, giving it a fresh, like-new look.
If you're wondering how to refinish the bathtub, this guide will walk you through the process step by step, making it easy for anyone, even first-time DIYers, to get great results. Whether you're dealing with a few minor imperfections or a tub that needs a complete overhaul, refinishing is an excellent way to breathe new life into your bathroom.
Reglazing vs. Refinishing: What’s the Difference?
When looking into restoring your bathtub, you may come across the terms "reglazing" and "refinishing." While they are often used interchangeably, there are some key differences between the two processes. Understanding these differences can help you decide which option is best for your tub.
Reglazing
It usually involves adding a shiny coating over the current surface of your bathtub. This is mainly for cosmetic purposes, helping to restore the tub’s shine and smoothness. However, reglazing is often considered a short-term solution, as the coating can wear off over time, especially in high-use areas.
Refinishing
Refinishing, however, is a more detailed process. It not only involves applying a new surface coating but also includes repairing any chips, cracks, or scratches in the tub. This makes refinishing a more comprehensive and long-lasting option, providing a more durable and smooth finish lasting for years.
When choosing between reglazing and refinishing, consider your tub’s condition. Reglazing works for minor issues, but refinishing is better for tubs with more wear, offering a longer-lasting result.
What Materials Do You Need to Refinish a Bathtub?
When learning how to refinish the bathtub, having the right tools and materials is essential to getting the job done right. Using the right equipment will make the process easier and ensure a smooth, professional-looking finish while keeping you safe from harmful chemicals.
Tools
- Sandpaper (80-120 grit for sanding, finer grit for smoothing)
- Painter's tape
- Respirator mask
- Paint roller or sprayer
Materials
- Tub repair kit (for cracks and chips)
- Cleaning solution (non-abrasive cleaner or a vinegar-baking soda mix)
- Epoxy or acrylic refinishing kit
- Primer and topcoat finish
Safety Gear
- Rubber gloves
- Safety goggles
- Ventilation fan (to reduce chemical exposure)
These tools, materials, and safety gear ensure the refinishing process goes smoothly, with the best results, while protecting your health and the surrounding area.
Can You Refinish a Bathtub Yourself?
Refinishing a bathtub is a totally manageable DIY project, even for beginners. With the right tools and materials, you can restore your bathtub to its former glory without hiring a professional. However, it’s important to remember that the process requires:
- Patience: Proper prep work is key to a successful result, so take your time with each step.
- Attention to detail: To achieve a smooth, professional finish, every step must be followed carefully and thoroughly.
- Safety precautions: Working with refinishing materials involves chemicals, so make sure to ventilate the area and wear protective gear to stay safe.
If you're ready to follow the steps and put in the time, refinishing a bathtub is a rewarding project. Learning how to refinish the bathtub on your own will save money and give your bathroom a fresh look!
How to Prep a Bathtub for Refinishing?
Proper preparation is vital to a successful refinishing project on your bathtub. Taking the time to prepare your bathtub properly will give you the best results and a smooth, lasting surface. Follow these steps to get your tub ready for refinishing:
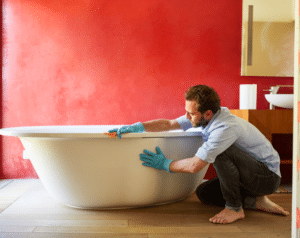
1. Clean Thoroughly
Before you begin, it’s crucial to clean your bathtub thoroughly. Use a non-abrasive cleaner to remove soap scum, mildew, and any debris from the surface. For stubborn stains, a mix of vinegar and baking soda works wonders to break them down and leave the surface fresh and ready for refinishing.
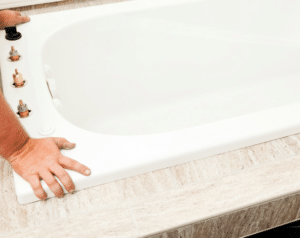
2. Repair Damage
If your bathtub has any chips, cracks, or other imperfections, use a tub repair kit to fill them in. This step ensures the surface is smooth and even before applying any refinishing materials. Allow the repairs to dry fully before continuing to the next step.
3. Sand the Surface
Gently sand the whole tub to remove the shiny coating. This step is crucial because it helps the primer and refinishing coating adhere better, ensuring a longer-lasting result. Don’t skip this step, it creates the perfect surface for the new coating.
4. Mask the Area
Use painter's tape to mask off areas around the bathtub, such as tiles, walls, and fixtures. This protects surrounding areas from accidental splashes or drips during refinishing.
5. Ventilate the Room
Since refinishing materials can release strong fumes, it's important to ensure proper ventilation. Open windows, use a fan or set up a ventilation system to reduce chemical exposure and keep the air fresh and safe while you work.
Proper prep ensures that the refinishing material bonds effectively and creates a flawless finish that lasts for years. By following these simple steps, you’ll be on your way to transforming your bathtub with ease!
Step-by-Step Guide: How to Refinish a Bathtub DIY
Now that your bathtub is prepped and ready, it's time to dive into the refinishing process. Here's a simple, step-by-step guide on how to refinish the bathtub and achieve professional-looking results.
1. Apply Primer
Begin by spreading a top-quality primer on the cleaned surface. This step is essential to ensure the refinishing material sticks properly. Use a paint sprayer or roller for even coverage, ensuring the entire surface is coated. Let the primer dry according to the instructions before proceeding to the next step.
2. Mix the Refinishing Product
Follow the instructions on your epoxy or acrylic refinishing kit to mix the solution correctly. It's important to get the proportions right to ensure the product works as intended. Take your time with this step to avoid any issues with the finish.
3. Apply the First Coating
Once your product is mixed, use a paint roller or sprayer to apply the first layer of refinishing material. Be sure to apply thin, smooth layers to avoid drips or streaks. Applying multiple light coats will help you achieve a smooth and even finish.
4. Let It Dry
Give the first coat enough time to dry all the way. Typically, this will take several hours, but be sure to follow the drying times listed on your refinishing kit. Take your time with this step; letting it dry properly helps the next coat stick better.
5. Apply Additional Coats
Apply 2-3 thin, even coats, allowing each one to dry completely before adding the next. Layering multiple coats will give your bathtub a smooth, shiny, and long-lasting finish.
6. Sand Between Coats
After drying each coat, lightly sand the surface with fine-grit sandpaper to smooth out any uneven areas. This will allow the next coat to stick better and give a smooth, perfect finish. Be careful during this step to prevent harming the surface.
7. Cure the Tub
After applying the final coat, let the tub sit for at least 48 hours to fully cure before using it. This will give the refinishing material enough time to fully set and harden, ensuring a long-lasting, durable surface.
By following these simple steps on how to refinish the bathtub, you can restore your tub to its former glory, saving both time and money in the process!
What Are the Cons of Reglazing a Tub?
While learning how to refinish the bathtub is a fantastic DIY option, it’s important to know some potential drawbacks before starting the project. Preparing for these issues will help ensure you make the best choice for your tub.
Durability Issues
Reglazing may not last as long as professional refinishing, especially in high-use areas, requiring more frequent touch-ups.
Chemical Odors
Refinishing involves strong fumes, so proper ventilation is essential to keep the air safe.
Limited Repairs
Refinishing may not fix major cracks or structural damage, so deeper issues might require additional repairs before refinishing.
Despite these considerations, refinishing remains an affordable and effective alternative to replacing a tub. By understanding these potential drawbacks and planning accordingly, you can still achieve great results and extend the life of your bathtub with a DIY refinishing project.
How to Clean and Maintain a Bathtub After Refinishing?
Once you've learned how to refinish the bathtub and achieved a beautiful, smooth finish, proper care is essential to keep it looking great for years to come. With the right maintenance, you can extend the life of your refinished tub and preserve its shine.
Use Gentle Cleaners
After refinishing, avoid harsh products that could scratch or harm the new surface. Clean the tub gently using a soft sponge or cloth and mild soap instead. This will help maintain the finish and keep it looking fresh.
Avoid Harsh Chemicals
Avoid strong cleaners like bleach or ammonia, as they can damage the refinishing material. Stick to non-abrasive, gentle cleaners to protect the surface and avoid discoloration.
Dry the Tub After Use
To prevent water spots and mildew buildup, make it a habit to wipe down the tub after each use. This simple step will help keep the surface clean and dry, reducing the need for deep cleaning.
By following these easy maintenance tips, your refinished bathtub will stay in great condition, allowing you to enjoy its like-new look for years.
Frequently Asked Questions
Is it okay to use a refinished bathtub for a bath?
Yes, refinished bathtubs are safe for regular use once the coating has fully cured. It’s essential to follow the recommended curing time, ranging from 24 to 48 hours, to ensure that the new surface has been properly set before getting in.
Does refinishing a tub cost less than replacing it?
Refinishing a bathtub is significantly affordable compared to replacing it. In most cases, refinishing costs a fraction of the price of installing a new tub, making it a more budget-friendly option for those looking to restore their bathtub without a large expense.
How much does it cost to refinish a walk-in shower?
The cost of refinishing a walk-in shower typically varies, but it generally ranges from $300 to $600 when using a DIY refinishing kit. This price can change depending on the size of the shower, the materials used, and whether any repairs are necessary before refinishing.
How many times can you reglaze a tub?
A tub can be reglazed 2-3 times, depending on its condition and how well the previous applications were done. Each reglazing process involves applying a new coating layer, but with wear and tear, the number of reglazing applications may be limited for optimal results.
How long does a bathtub resurfacing last?
Maintaining your refinished bathtub properly can extend its life to 10 to 15 years. The longevity of the resurfacing depends on the quality of the refinishing process and how well the tub is maintained over time to prevent damage and wear.
Conclusion
Refinishing your bathtub is not only a great way to refresh your bathroom, but it’s also a cost-effective solution that can completely transform your space. At Ft. Worth Refinishing, we make it easy for you to learn how to refinish the bathtub like a pro. With a little effort, your old tub will look brand new!
Why spend thousands on a new tub when you can save money and achieve beautiful results by refinishing? By following the simple steps we’ve shared, you can enhance your bathroom and enjoy the satisfaction of completing the project yourself. Ft. Worth Refinishing is here to guide you through the process of how to refinish the bathtub with ease.
Ready to make your bathroom shine without the hefty price tag? Whether you’re tackling the project independently or seeking expert help, Ft. Worth Refinishing is here to assist you. Learn how to refinish the bathtub with our professional services or DIY tips, and enjoy a bathroom that looks fresh and inviting!
End Note
At Ft. Worth Refinishing, we specialize in making your bathroom and kitchen spaces look brand new without the high cost of replacements. Whether you're interested in bathtub refinishing or shower refinishing, our team has the expertise to handle all your refinishing needs. We’re proud to offer affordable and professional services that can transform your bathroom quickly. Explore Our Services today and see how we can bring your vision to life.
Not sure where to start? Visit our Gallery for before-and-after photos of our recent projects. If you're looking for a reliable refinishing company, check out our About Us page to learn more about our team and our commitment to quality.
We proudly serve the Ft. Worth area and surrounding regions, ensuring that your home improvement projects are in good hands. Visit our Areas We Serve page to learn more about the locations we cover.
If you're all set to take the next step, Contact Us now. You can keep in touch with us by following our Facebook page to stay updated. Don’t forget to check out our Blog for more tips and insights on how to refinish the bathtub and other home improvement projects. Allow Ft. Worth Refinishing to help you create the bathroom of your dreams!