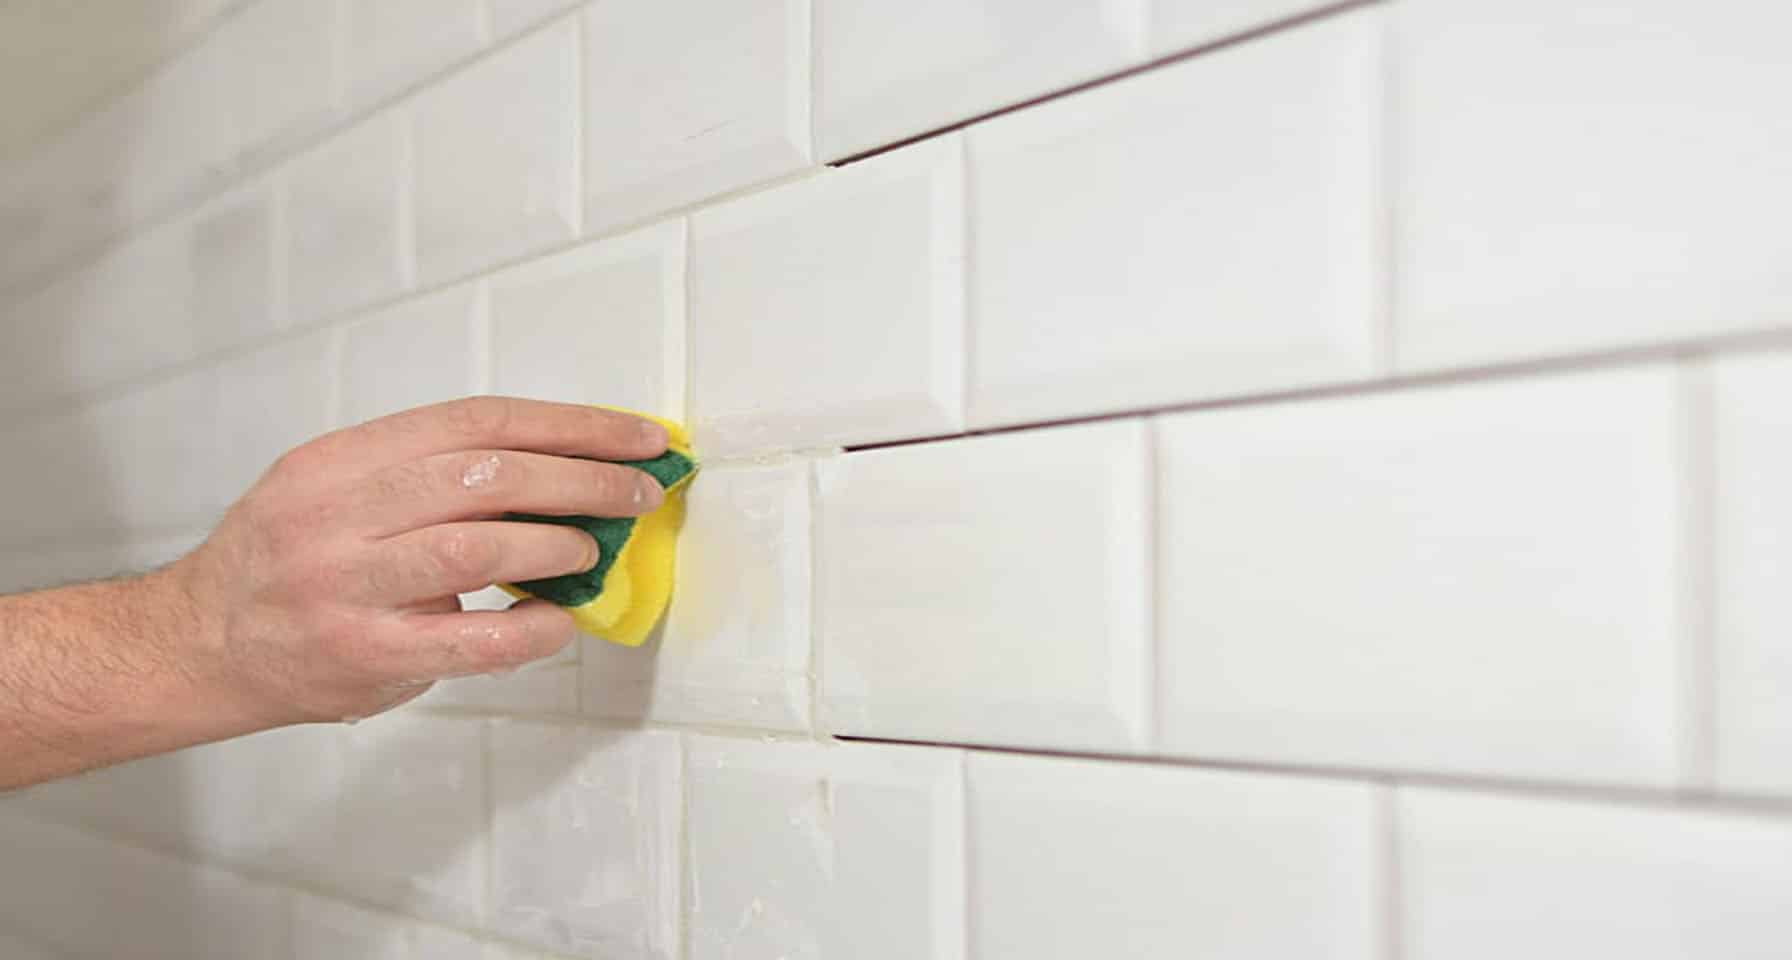
Understanding bathroom tile reglazing starts with knowing that it is a surface restoration process, not a replacement. Instead of tearing out old tile, professionals deep clean, repair, and prepare the existing surface so a specialized coating can properly bond. This involves removing soap scum and residue, etching or sanding the tile, and fixing chips or grout issues before applying a durable primer and topcoat. Once cured, the result is a smooth, refreshed surface that looks updated and is easier to maintain. It is a practical option for homeowners who want to improve the appearance of their bathroom without the cost, time, and disruption of a full renovation.
Bathroom vanity refinishing often complements tile reglazing to create a more cohesive update. Rather than replacing cabinetry, the vanity is cleaned, sanded, repaired, and finished with a moisture-resistant coating or stain. This process can dramatically improve the look of worn or outdated vanities while extending their lifespan. When combined, reglazing and refinishing offer a cost-effective way to modernize a bathroom, especially if the existing materials are still structurally sound.
What Bathroom Tile Reglazing Is and What It Is Not
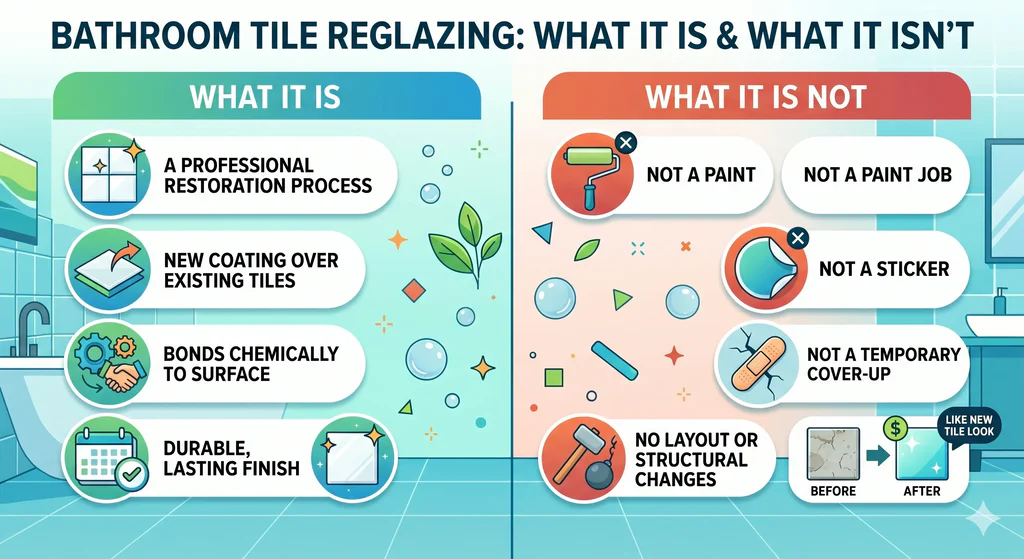
- Reglazing is a professional surface restoration process that applies a new coating directly over existing tiles without removing them.
- It is not a paint job, a sticker, or a temporary cover-up. The coating bonds chemically to the tile surface for a durable, lasting finish.
- The terms reglazing, refinishing, and resurfacing all refer to the same process and are used interchangeably in the industry.
- Reglazing does not change the structure or layout of your bathroom. It works with what is already there.
- It is designed to restore the appearance of tiles that are cosmetically worn but still structurally sound.
- The result is a refreshed surface that looks clean, smooth, and visually comparable to new tile without the cost or disruption of replacement.
To understand whether reglazing or replacement is the better path for your situation, our parent guide on Is Bathroom Tile Reglazing Worth It? covers both options in full detail.
The Surfaces That Can Be Reglazed
Not every surface in your bathroom is a candidate for reglazing. Knowing what works and what does not helps you set accurate expectations before the project begins.
Surfaces That Respond Well
- Ceramic wall tiles in showers, tub surrounds, and bathroom walls are among the most suitable for reglazing and ceramic tile refinishing due to their smooth, non-porous surface.
- Porcelain floor tiles and wall tiles that are intact and stable
- Fiberglass and acrylic tub surrounds that have surface-level wear
- Bathroom sinks and vanity surfaces made from porcelain or ceramic
- Grout lines that are still intact but discolored or stained
Surfaces That Are Not Ideal Candidates
- Natural stone tiles such as marble, slate, or travertine, which have porous surfaces that require different treatment
- Tiles that are cracked through to the substrate or structurally compromised
- Surfaces with active water leaks or moisture damage behind the wall
- Tiles that are already loose, hollow when tapped, or lifting at the edges
The Full Reglazing Process Step by Step
Understanding exactly what happens during a professional reglazing job helps you know what to expect on the day of service and why each step matters for the final result.
Step 1: Surface Cleaning and Degreasing
- The technician begins by cleaning the tile surface thoroughly to remove all soap scum, hard water deposits, grease, and biological buildup.
- This step is non-negotiable. Any residue left on the surface will prevent the coating from bonding properly.
- Professional-grade cleaning agents are used that are more effective than standard household products.
Step 2: Repair of Chips, Cracks, and Imperfections
- Before any coating is applied, visible chips, scratches, and minor cracks are filled and smoothed out.
- This repair work ensures the new surface looks uniform and prevents moisture from getting under the coating later.
- Larger structural damage that cannot be repaired at the surface level may disqualify the tile from reglazing entirely.
Step 3: Masking and Ventilation Setup
- All surrounding fixtures, hardware, floors, and surfaces that are not being reglazed are masked off carefully to protect them.
- Proper ventilation is set up before any chemical products are applied. This is a critical safety step that reputable professionals take seriously.
- The bathroom area is prepared to minimize fumes spreading to other parts of the home.
Step 4: Application of the Bonding Agent
- A bonding primer or adhesion promoter is applied to the cleaned tile surface.
- This layer is what allows the topcoat to chemically adhere to the existing tile rather than simply sitting on top of it.
- Without a proper bonding agent, even a high-quality topcoat will eventually peel or lift.
Step 5: Application of the Topcoat
- The finishing topcoat is applied using a spray system that delivers an even, smooth layer across the entire surface.
- Multiple thin coats are typically applied to build up the finish and ensure full coverage.
- The technician inspects the surface between coats to catch any drips, uneven areas, or missed spots.
Step 6: Curing Time
- Once the final coat is applied, the surface must be left undisturbed to cure fully.
- Most professional-grade coatings require 24 to 48 hours of cure time before the surface can be used.
- Using the bathroom too early is one of the most common causes of finish damage, so following the technician’s curing instructions precisely is important.
What the Finished Surface Looks and Feels Like
- A properly reglazed surface feels smooth and clean to the touch, similar to the original factory finish of new tile.
- The coating is available in a range of colors and finishes, including gloss, satin, and matte, depending on the product used.
- Most homeowners choose white or off-white to restore the original look, but custom color options are available through many professional services.
- The surface will reflect light evenly without visible brush marks, drips, or texture inconsistencies when applied correctly.
- Minor surface variations that existed in the original tile may still be faintly visible beneath the coating, particularly in older tiles with heavy texture.
How Reglazing Compares to Other Restoration Options
Reglazing is not the only surface restoration option available, but it is often the most practical for standard bathroom tile.
Reglazing Versus Tile Paint
- Tile paint is a consumer-grade product that can be applied without professional equipment, but it does not bond to the surface in the same way as professional reglazing coatings.
- Tile paint tends to chip, peel, and wear much faster, particularly in wet environments like showers.
- Professional reglazing uses industrial-grade bonding agents and topcoats that outperform consumer tile paint in durability and longevity by a significant margin.
Reglazing Versus Tile Overlays
- Tile overlays involve placing a new thin layer of tile or stone product directly over the existing surface.
- This option changes the height of the floor or wall slightly, which can create issues around fixtures, drains, and door frames.
- Reglazing does not add any meaningful thickness to the surface, so it avoids those complications entirely.
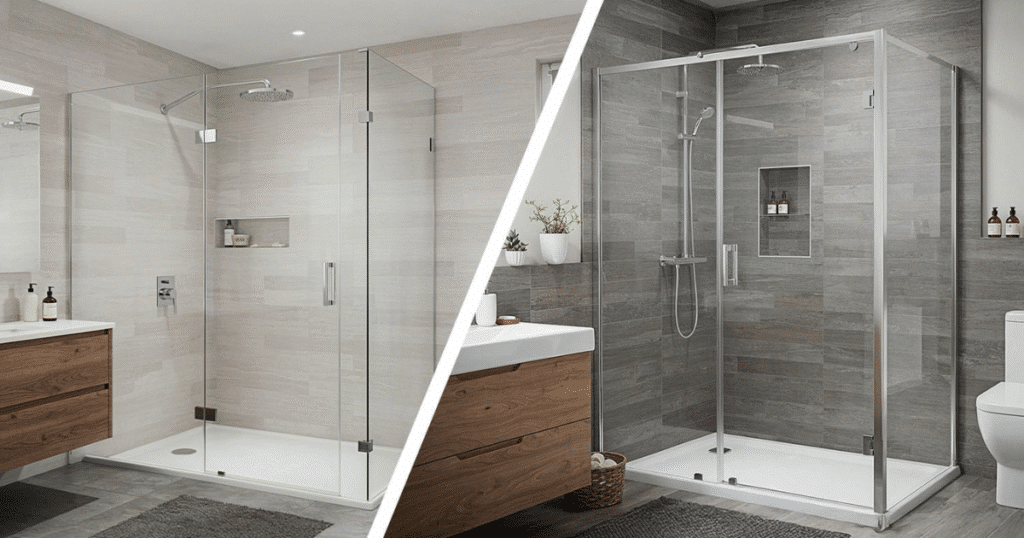
Reglazing Versus Full Replacement
- Full replacement removes everything down to the substrate and installs an entirely new tile.
- It is the right choice when there is structural damage, water intrusion, or a complete design change is needed.
- For tiles that are still sound but cosmetically tired, reglazing delivers a comparable visual result at a lower investment and with far less disruption.
Many bathroom improvement approaches fall under broader remodeling and repair strategies that focus on restoring functionality while improving visual appeal.
If you’re weighing renovation costs and convenience, read Why Homeowners Choose Bathroom Tile Reglazing Over Replacement to see why many skip demolition.
What Affects the Quality and Longevity of a Reglazing Job
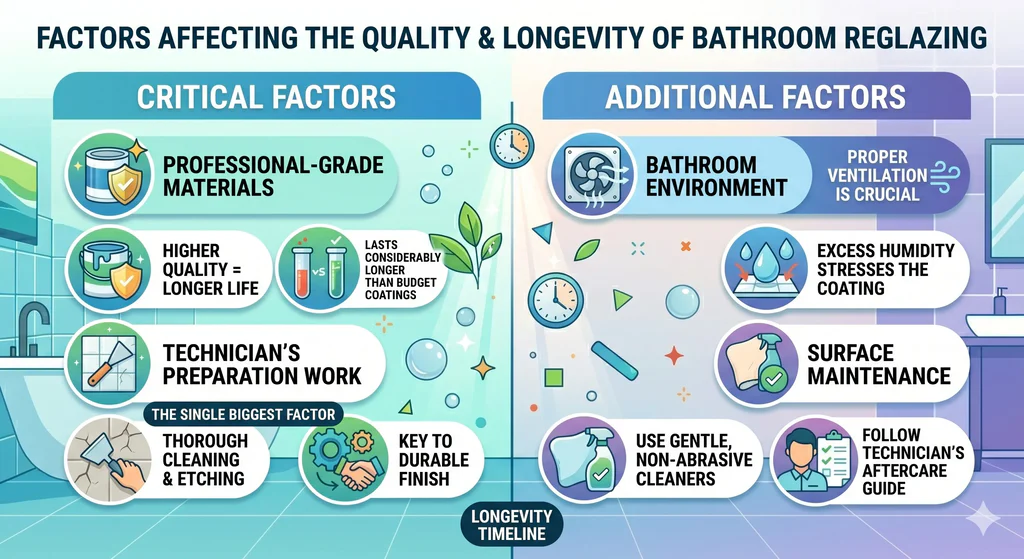
- The quality of the products used matters significantly. Professional-grade coatings last considerably longer than budget alternatives.
- The technician’s preparation work is the single biggest factor in how well the finish holds over time.
- The environment plays a role as well. Bathrooms with poor ventilation or excessive humidity will put more stress on the coating.
- How the surface is maintained after the job directly impacts how long the finish lasts.
- Homeowners who use gentle, non-abrasive cleaners and follow their technician’s aftercare guidance consistently get the most out of their reglazed surfaces.
Common Misconceptions About Bathroom Tile Reglazing
Many homeowners have questions or assumptions about reglazing that are worth clearing up before making a decision.
It Is Just Paint
- This is the most common misconception. Professional reglazing coatings are not paint.
- They are specially formulated chemical compounds that bond to ceramic and porcelain surfaces at a molecular level.
- The durability, finish quality, and lifespan are not comparable to anything available in a standard paint can.
It Will Peel Right Away
- Peeling is almost always the result of poor surface preparation or a rushed application, not an inherent flaw in the reglazing process itself.
- A properly prepared and professionally applied finish is designed to last for years with appropriate care.
- Choosing a reputable technician with a track record of quality work is the most reliable way to avoid this outcome.
It Can Fix Any Tile Problem
- Reglazing is a surface restoration process, not a structural repair solution.
- It cannot fix tiles that are cracked through to the wall, address water damage behind the surface, or stabilize tiles that are coming loose.
- A professional inspection before the project begins will identify whether the tiles are suitable candidates.
Tips for Preparing Your Bathroom Before the Technician Arrives
Taking a few simple steps before your reglazing appointment helps the process go smoothly and protects your home during the job.
- Remove all personal items from the bathroom, including shampoo bottles, soaps, and accessories, before the technician arrives.
- Clear the area around the tub, shower, or tile surface so the technician has full access to the work area.
- Make arrangements to keep the bathroom unoccupied for the full duration of the job and for the curing period afterward.
- Ensure there is access to a window or ventilation source in or near the bathroom.
- Let the technician know in advance about any existing damage, previous repairs, or areas of concern so they can assess them properly before work begins.
- Keep pets and children away from the work area throughout the process and during the curing period.
Planning and preparation are key parts of any bathroom improvement project, helping ensure smoother execution and more consistent results.
To avoid wasting money on the wrong renovation choice, read When to Reglaze Bathroom Tiles and When to Replace Them before starting your project.
Make the Most of Your Bathroom Restoration
Bathroom tile reglazing is a process that rewards preparation, knowledge, and the right professional for the job. When you understand what is involved from start to finish, you are in a much better position to ask the right questions, set realistic expectations, and get a result that genuinely improves your bathroom for years to come. The process is straightforward when done correctly, and the difference it makes to a worn, dated bathroom can be remarkable.
Fort Worth Refinishing brings the expertise, professional-grade materials, and attention to detail that Arlington, TX, homeowners deserve. If you are ready to see what reglazing can do for your bathroom tiles, contact us today or give us a call to schedule your consultation.
Frequently Asked Questions
How many coats are applied during a professional reglazing job?
Most professional technicians apply multiple thin coats to build up an even, durable finish. The exact number depends on the product used and the condition of the tile surface being treated.
Can reglazing be done on floor tiles as well as wall tiles?
Yes, both floor and wall tiles can be reglazed. Floor tiles may require a topcoat with a non-slip additive to ensure the surface remains safe for foot traffic after the job is complete.
Will the reglazed surface match the rest of my bathroom?
A skilled technician can match the color and finish closely to the surrounding surfaces. It is worth discussing your color expectations during the consultation so the technician can select the most appropriate product.
Can I stay in my home while the reglazing is being done?
You can remain in other areas of the home, but the bathroom being reglazed must be vacated during application and throughout the curing period. Proper ventilation should be maintained to allow fumes to dissipate safely.
What happens if the coating gets scratched or chipped after the job?
Minor chips or scratches can often be repaired by a professional without redoing the entire surface. Addressing small damage early prevents moisture from getting under the coating and causing larger issues.
How do I know the technician used quality materials?
Ask the technician directly about the brand and type of coating they use, and request documentation or a product sheet if needed. Reputable professionals are transparent about the materials they apply.
Is there a strong smell during the reglazing process?
Yes, the coatings used in professional reglazing have a noticeable chemical odor during application. This is expected and why proper ventilation is essential. The smell dissipates fully once the surface has cured.
Does reglazing work on colored or patterned tiles?
Yes, reglazing can be applied over colored or patterned tiles. The new coating covers the existing color or pattern entirely, giving the surface a uniform, refreshed appearance in the chosen finish.
How soon after reglazing can I use cleaning products on the surface?
Most technicians recommend waiting at least 48 to 72 hours after the cure period before introducing any cleaning products. When you do begin cleaning, use only mild, pH-neutral products to protect the finish.